
Installation
Dyad Studio is a standalone application for building, simulating, and analyzing models. Download the app for your computer, open it, and sign in to JuliaHub.
Download Dyad Studio
Choose a download for your operating system and processor below.
| Platform | Architecture | Download |
|---|---|---|
| macOS | Apple Silicon (M-series) | Download .dmg |
| Windows | x86_64 (Intel / AMD) | Download .appx |
| Linux | x86_64 (Intel / AMD) | Download .AppImage |
Official builds support Windows and Linux on x86_64, and macOS on Apple Silicon. Use a computer with at least 4 CPU cores and 8 GB of RAM, and allow network access to juliahub.com for downloads, authentication, and AI features.
ARM Linux, ARM Windows, and Intel Macs have no official Dyad Studio builds. See Manual installation for the ordinary Julia and package workflow on these architectures.
Install and open the app
Windows: Open the downloaded
.appxwith Windows App Installer, select Install, then launch Dyad Studio from the Start menu. App Installer is also available from the Microsoft Store.macOS: Open the
.dmg, drag Dyad Studio to Applications, then open it.Linux: Make the
.AppImageexecutable, then launch it. In the download directory, run:bashchmod +x dyad-studio-3.4.0-linux-x86_64.AppImage ./dyad-studio-3.4.0-linux-x86_64.AppImage
Sign in to JuliaHub
Open Dyad Studio and sign in to your JuliaHub account. If you need an account, create one on JuliaHub. Authentication gives you access to the Julia libraries used to compile, simulate, and analyze models.
Continue with Getting Started to create a component library and run your first simulation.
Manual installation
Use this route to work in an existing Visual Studio Code installation or to use ordinary Julia and packages on an architecture without an official Dyad Studio build. The other architectures are untested; package availability depends on the architecture and the libraries your model uses.
Install Visual Studio Code
Install Visual Studio Code, version 1.108.0 or newer.
Install the Dyad Studio extension
Open the Extensions sidebar in VS Code and search for Dyad, or open Dyad Studio in the Marketplace.
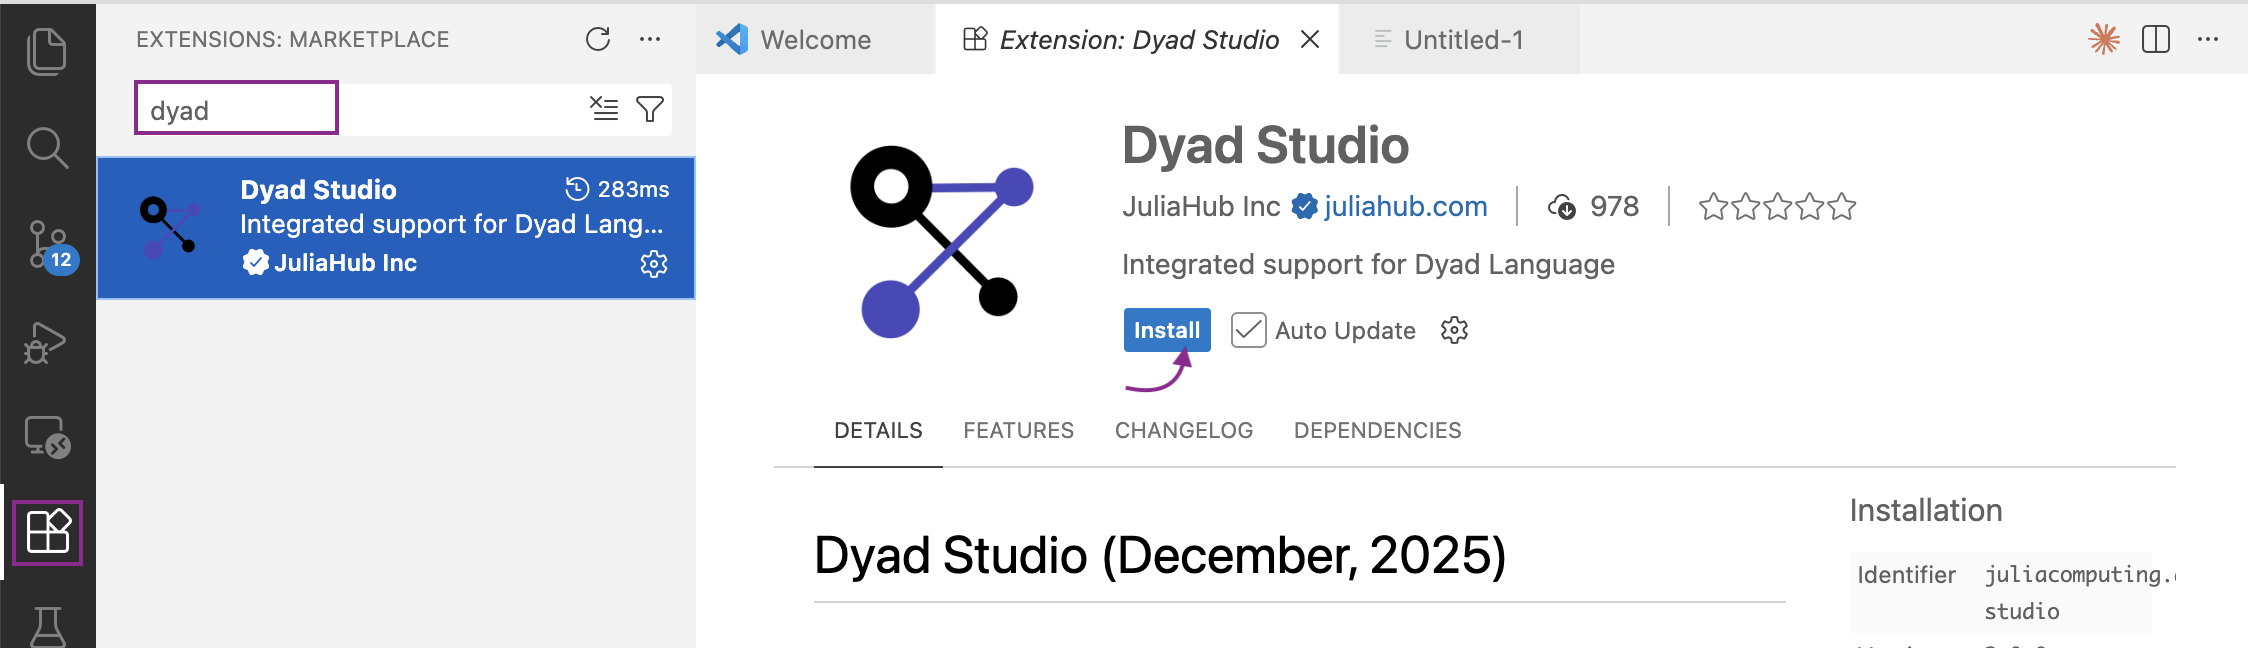
Installing the extension also installs its Julia and JuliaHub extension dependencies.
Check the installation walkthrough
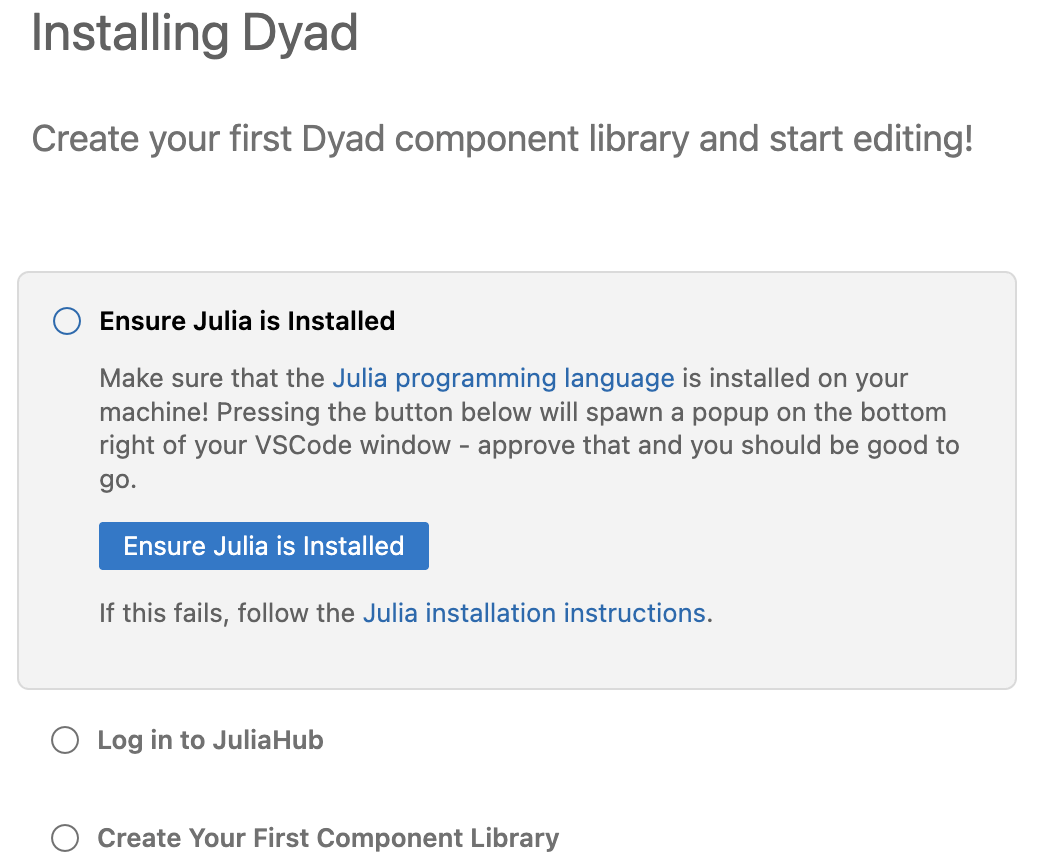
Open the Command Palette with Ctrl+Shift+P on Windows or Linux, or Cmd+Shift+P on macOS. Search for Walkthrough, then select Installing Dyad. Follow the setup steps and sign in to JuliaHub.
On ARM Linux, ARM Windows, or Intel macOS, use the ordinary Julia setup below for the walkthrough's Julia installation step.
Use ordinary Julia on other architectures
For ARM Linux, ARM Windows, or Intel macOS, install Julia through Juliaup: Install JuliaOfficial Juliaup installation instructions
macOS and Linux: Run in a terminal:
curl -fsSL https://install.julialang.org | shWindows: Run in PowerShell:
winget install --name Julia --id 9NJNWW8PVKMN -e -s msstoreThen add Julia 1.12:
juliaup add 1.12In each project's .vscode/settings.json, set the Julia executable and language server channel:
{
  "julia.executablePath": "julia +1.12",
  "julia.languageServerJuliaupChannel": "1.12"
}
Remove any julia.juliaup.server setting so Juliaup uses the ordinary Julia distribution server. Use this Julia installation to install the packages required by your project; the Dyad distribution is unavailable on these architectures.
Once setup is complete, follow Getting Started.