Julia IDE
Interactively develop code with the Julia IDE in the cloud
JuliaHub offers interactive development in the cloud by launching one of the standard applications. After logging in you can find these under the Run->Applications menu:
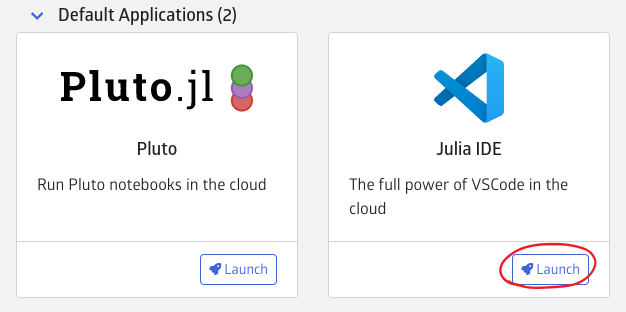
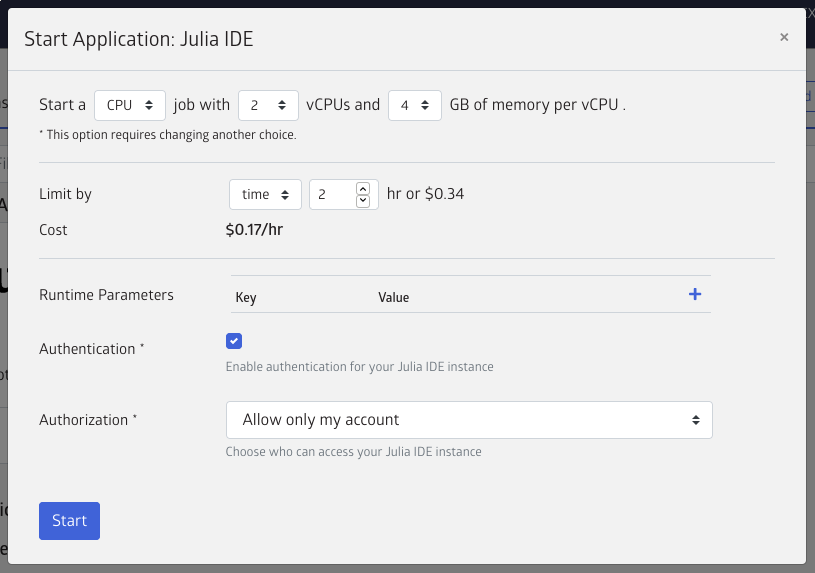
Clicking the launch button for "Julia IDE" will lead to the instance launch widget where you can choose the number of CPUs, amount of memory, etc. For the purposes of this simple tutorial we will choose a small instance. You can set the maximum cost by the time limit — if you need more time you can always extend it later.
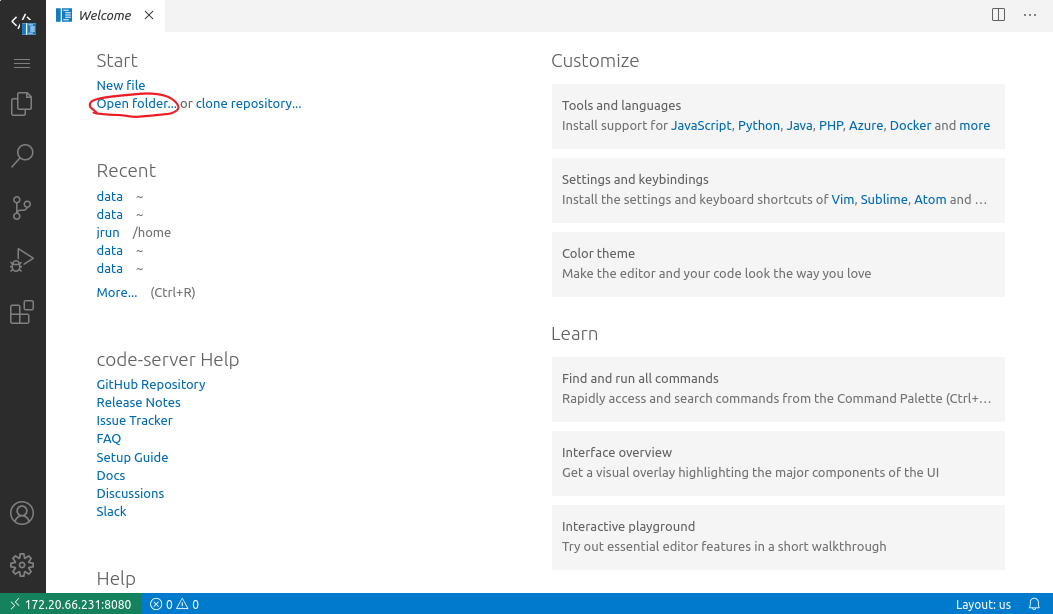
After clicking the launch button, you may need to wait for a few minutes for the job to be launched and the instance to become available. Once it is, you'll see the application's connect button light up and you can launch into the Julia IDE which will bring up the VSCode interface.
If you're new to VSCode, now is a good time to open the julia-vscode starter documentation for reference. Some particular points of note:
- The Command Palette (press
F1orCtrl+Shift+P) is central to accessing the VSCode functionality. You can access Julia- or JuliaHub-specific functionality through the palette by typing theJulia:orJuliaHub:prefix respectively. - Access the Julia command line with the
Julia: Start REPLcommand (see also the full documentation). Show the terminal with the $Ctrl+`$ shortcut if necessary. - Run the current block of code under your cursor in the editor using
Alt+Enter.
Creating, running and saving code
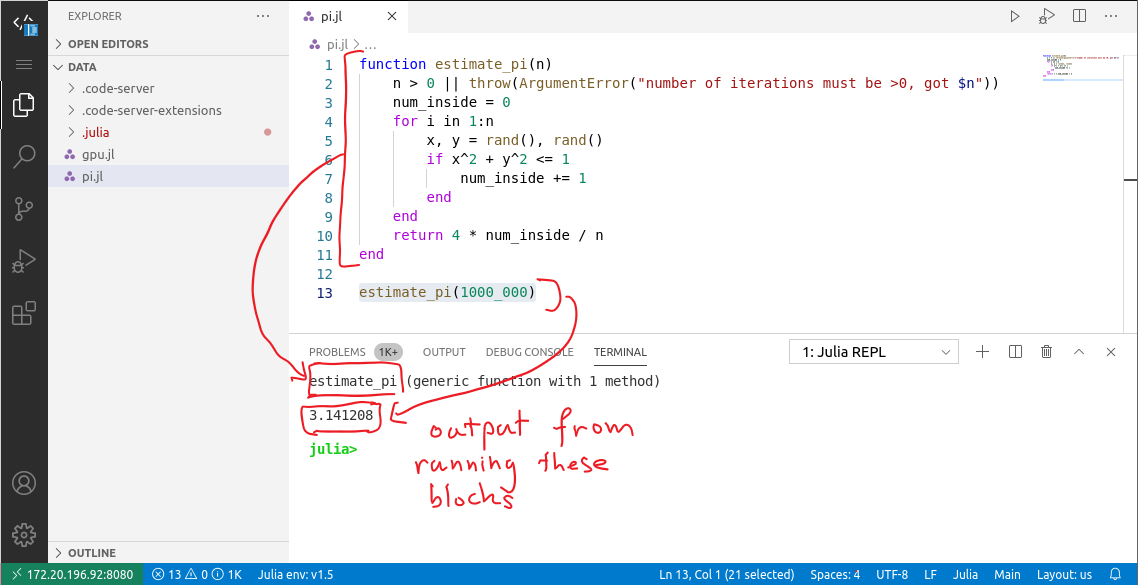
Let's try out some very simple code by taking the sequential pi estimation from a previous tutorial.
First, open the folder /home/jrun/data in the file explorer (Click on "open folder" or use F1+"open folder") and create a new file by right clicking in the file explorer — let's name it pi.jl.
⚠ All files must be saved in /home/jrun/data if you want them to persist to your next session
Now enter the following code
function estimate_pi(n)
    n > 0 || throw(ArgumentError("number of iterations must be >0, got $n"))
    num_inside = 0
    for i in 1:n
        x, y = rand(), rand()
        if x^2 + y^2 <= 1
            num_inside += 1
        end
    end
    return 4 * num_inside / n
end

estimate_pi(1000_000)
Press Alt+Enter to execute the two blocks of code here, and you'll see the output in the terminal at the bottom of the screen:
Next steps
JuliaHub gives you access to more compute and novel hardware for interactive development than you'd get with a typical laptop. Here's some things to try next:
- Try a larger CPU with more cores, and the distributed version of
estimate_pifrom the basic tutorial. - Start a GPU instance with CUDA, and try out GPU development by following along with the starter tutorial from CUDA.jl.