Projects for Team Collaboration
Introduction
JuliaHub Projects were built to help teams work together on a shared set of resources. When you start a project, you are asked which team members to add and which set of resources you would like to share starting with creating a directory (also known as a repository).
Currently, a project consists of files, linked blobs (of data), entrypoints, and metadata associated with artifacts. You can see how it works:
Creating a Project
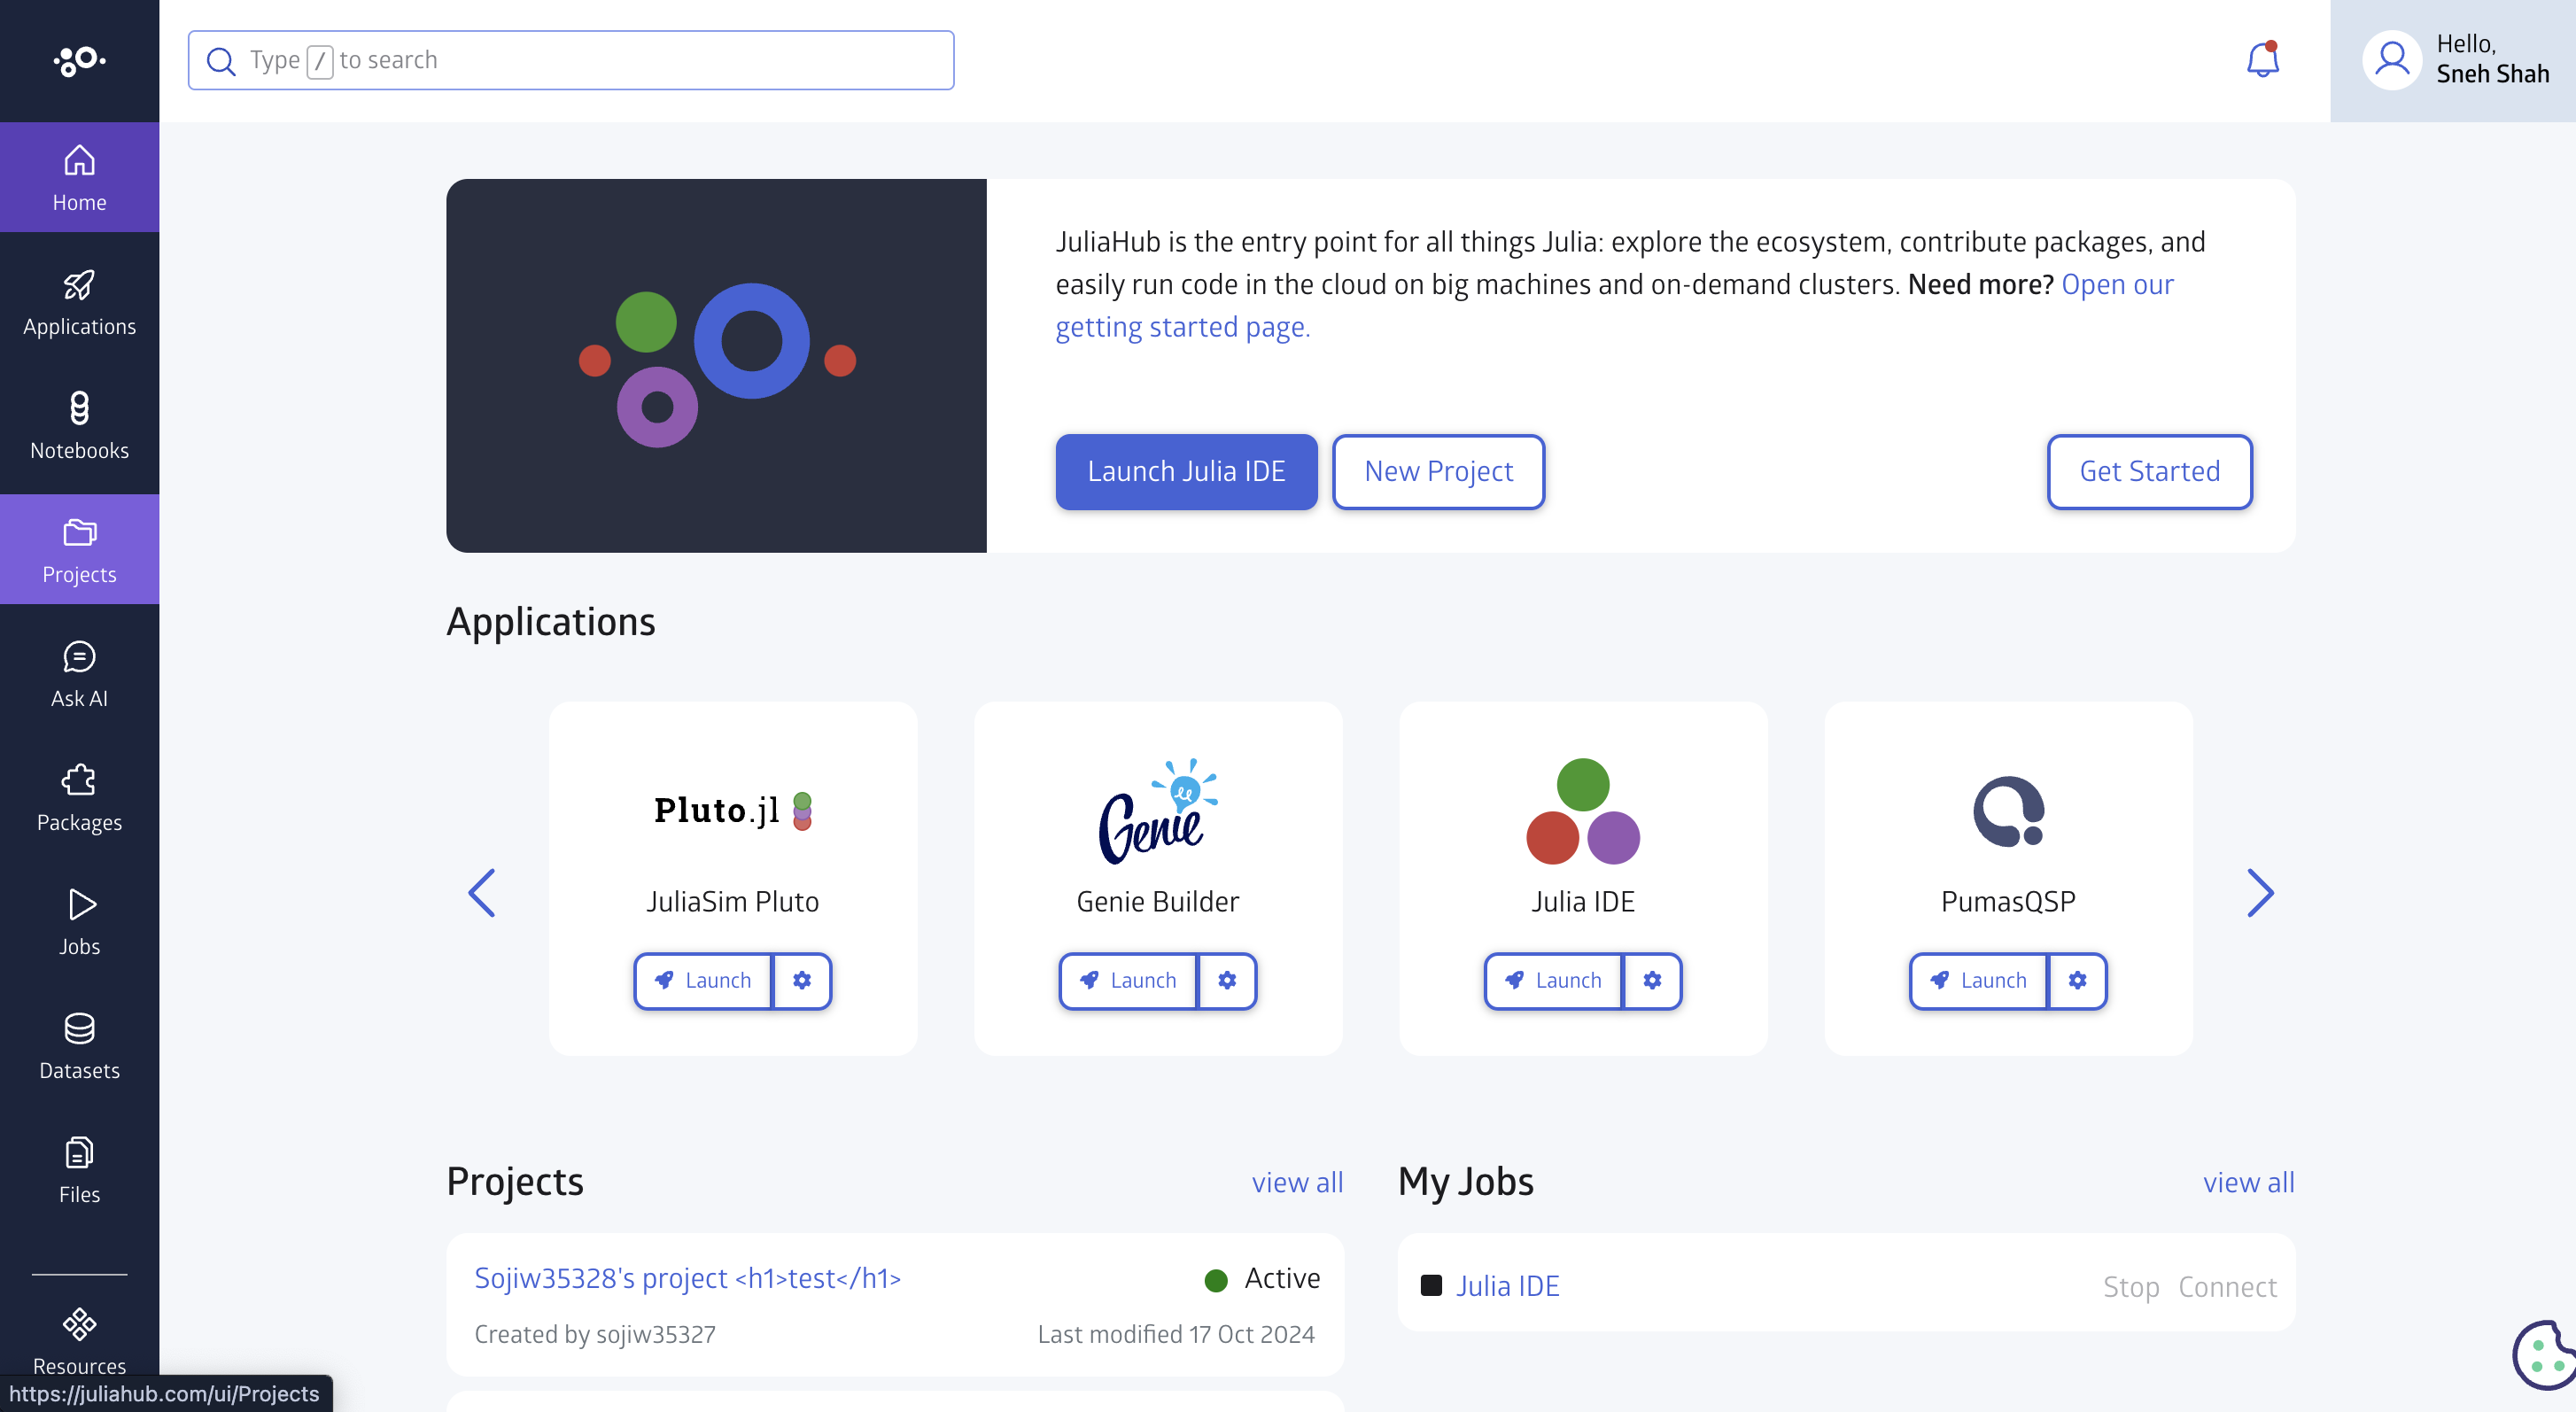
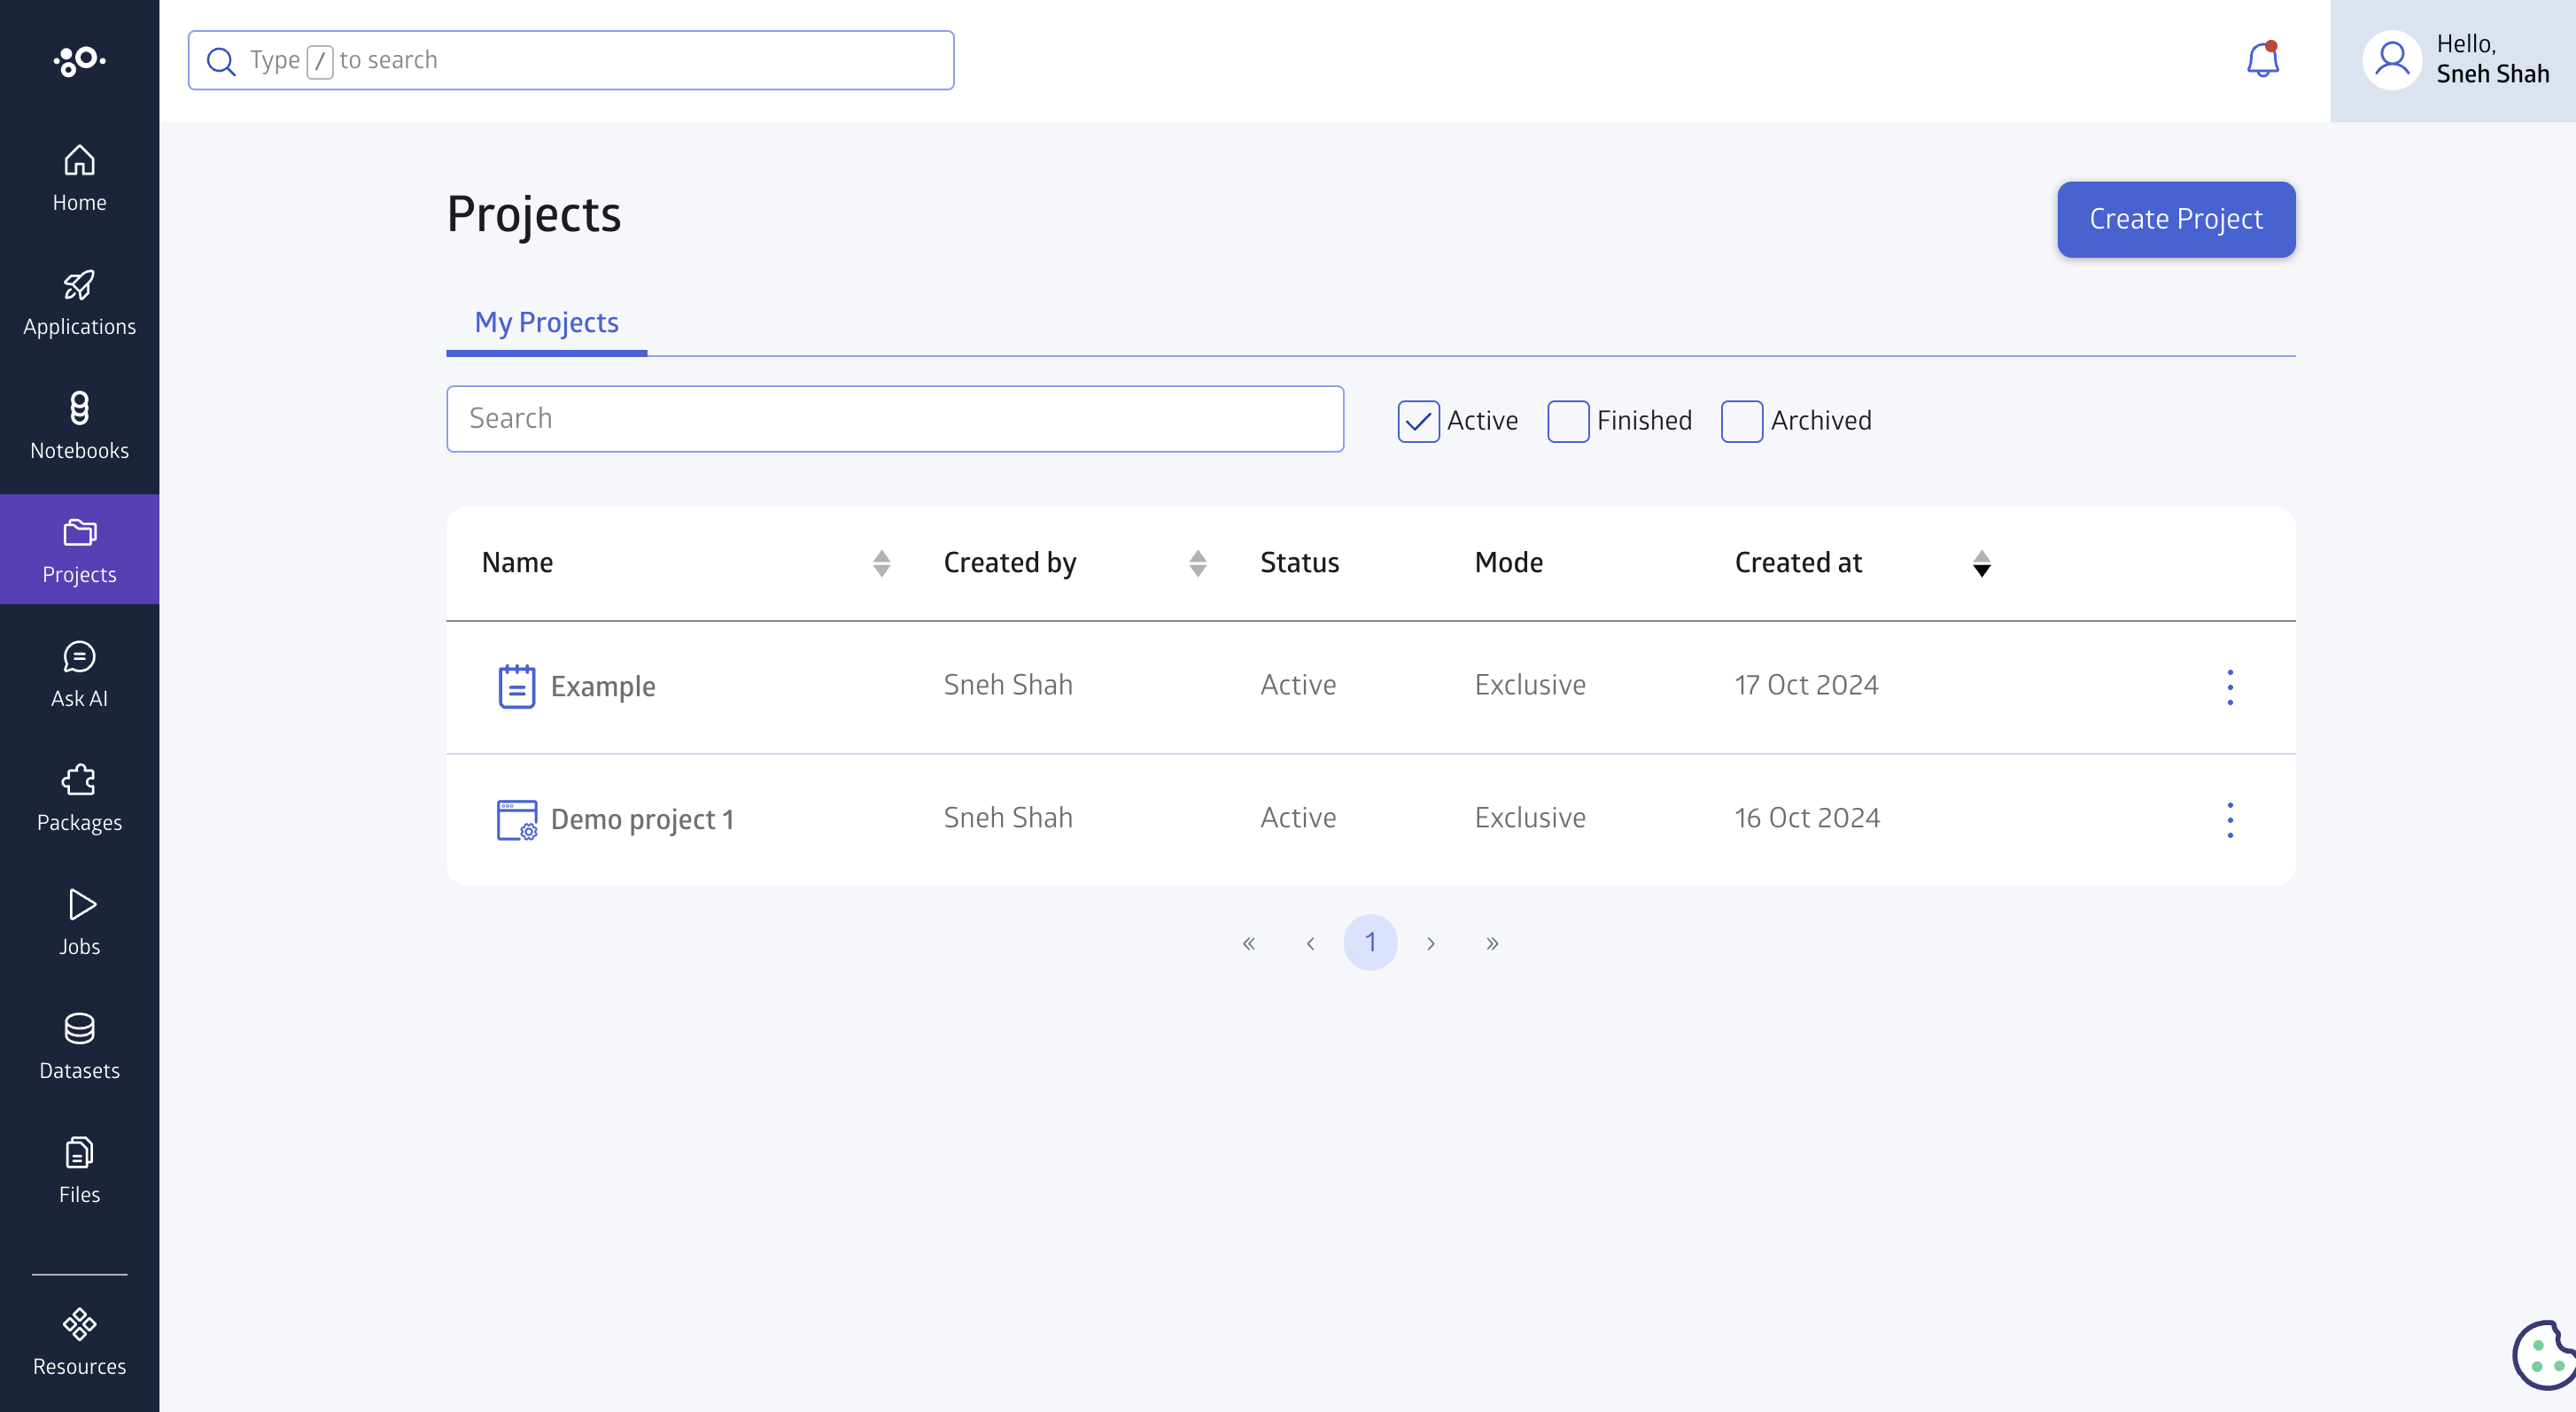
To create a project you will need to navigate to Projects tab from the left menubar.
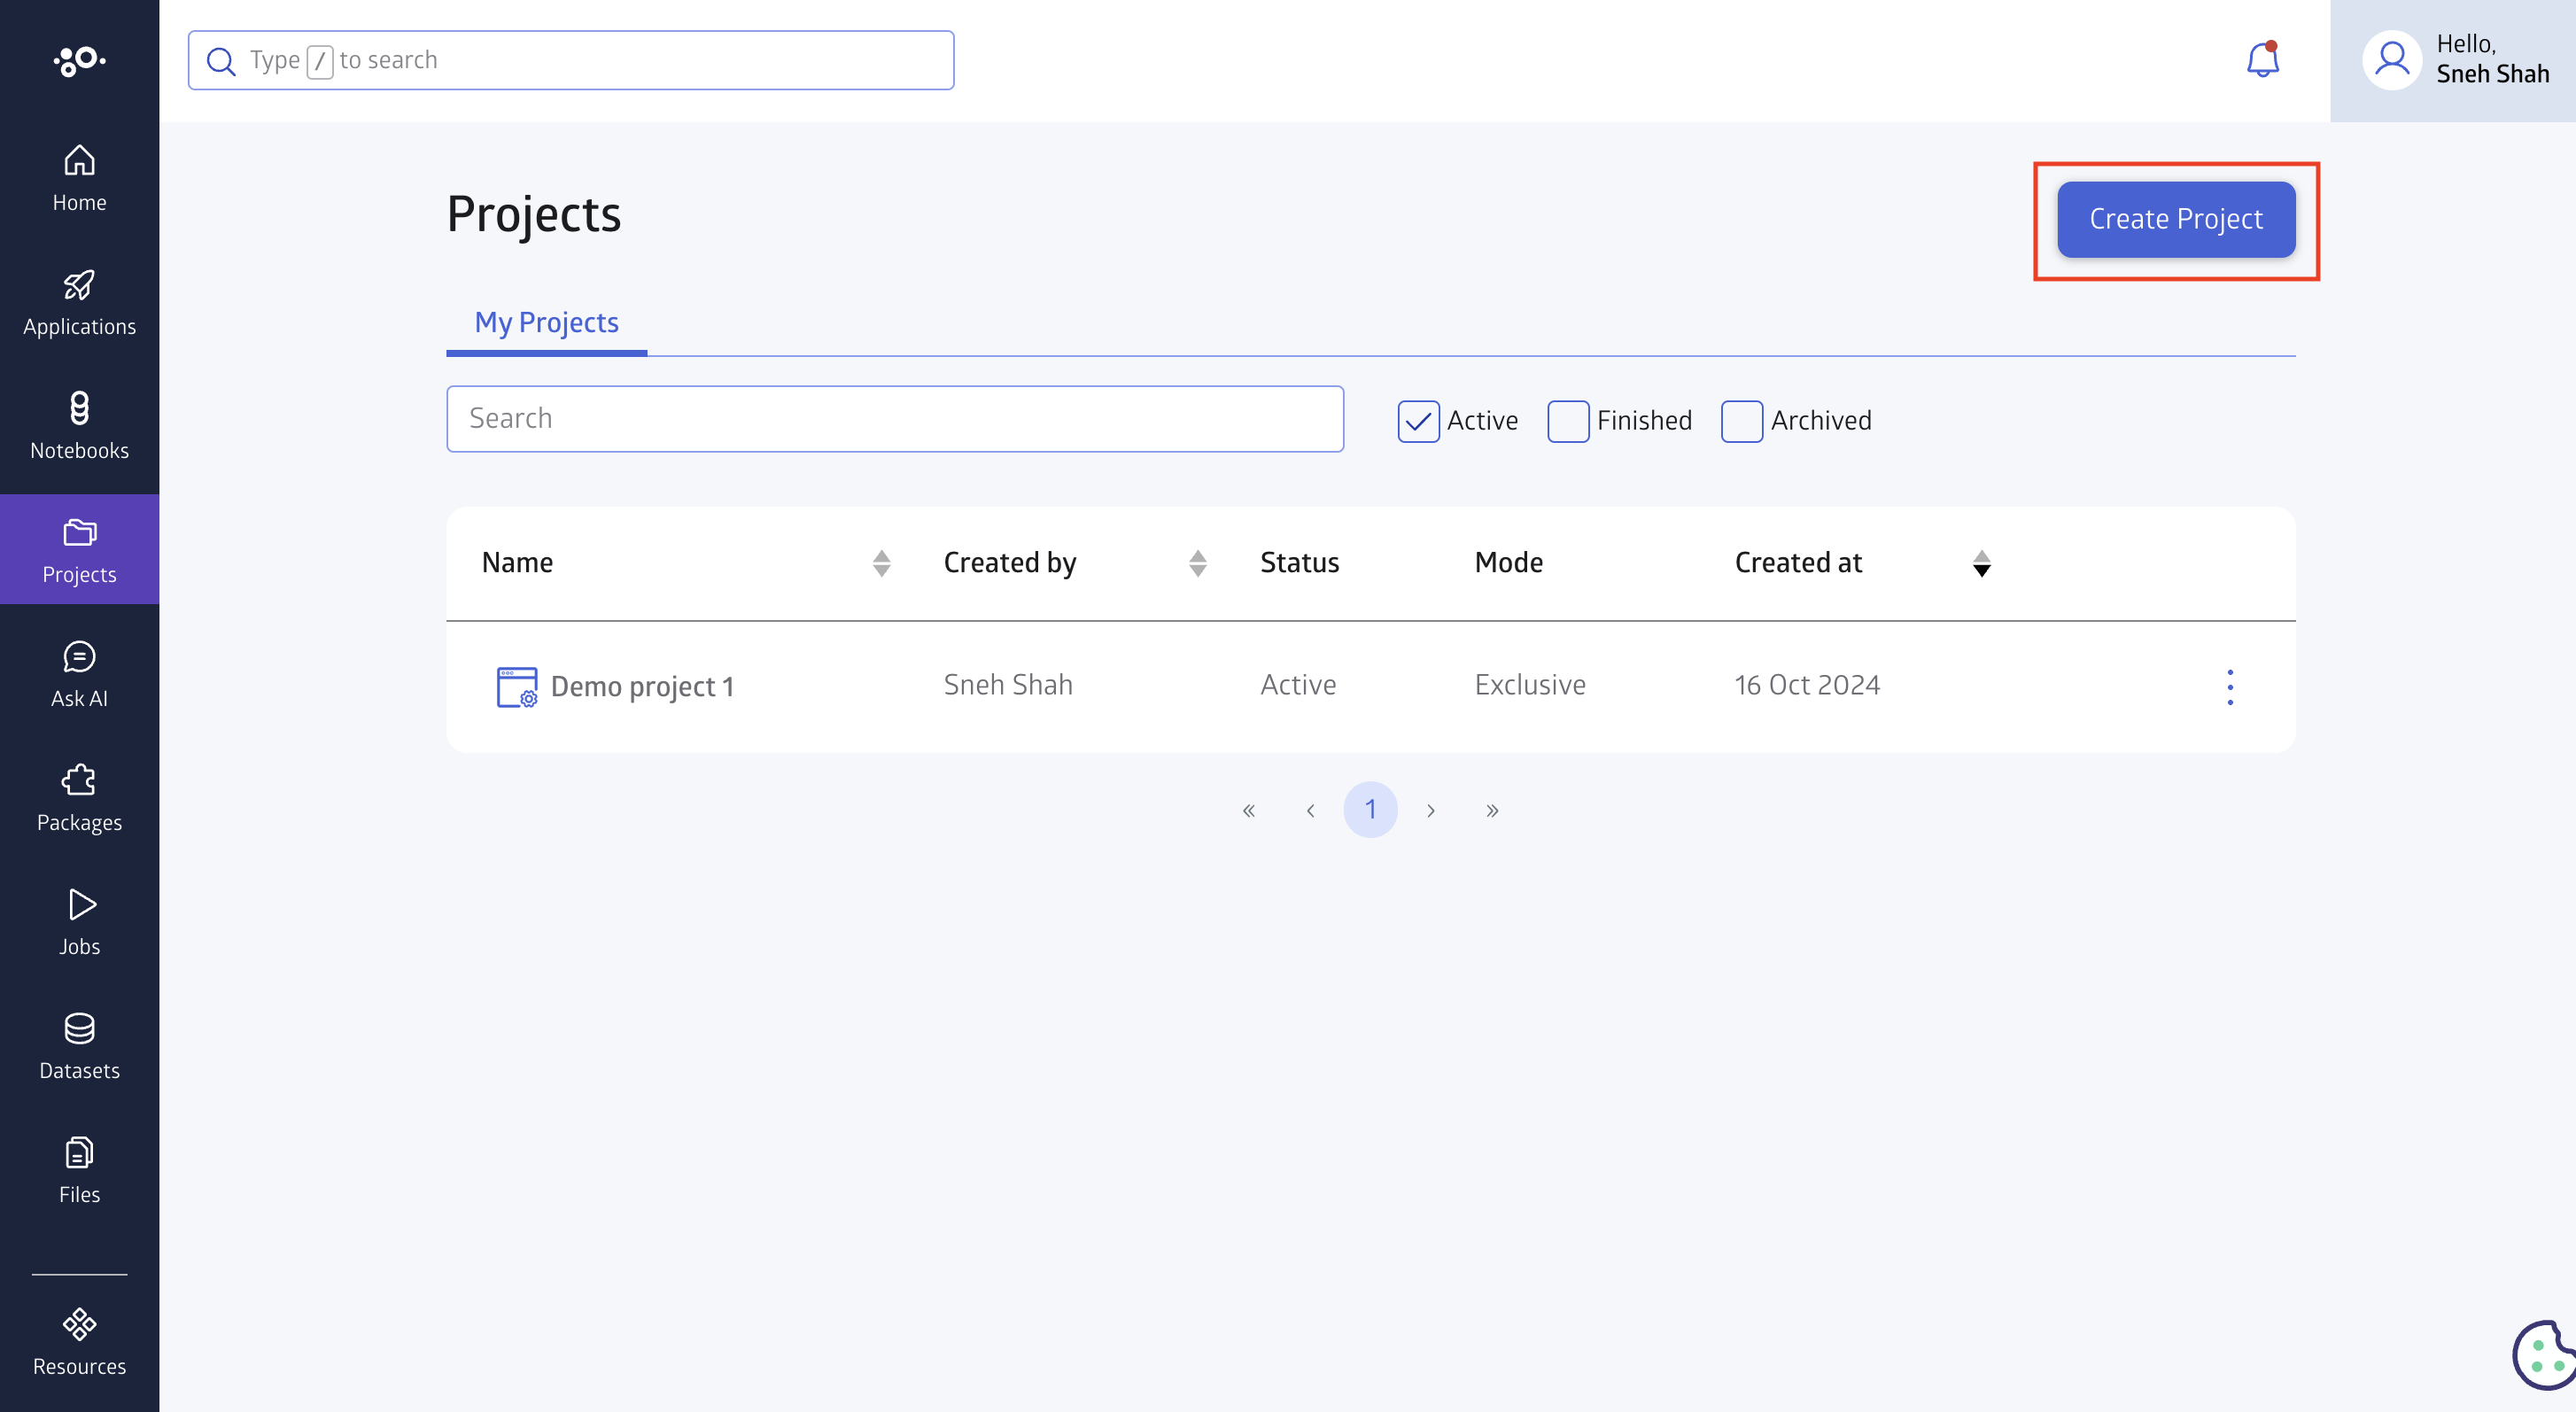
Click on the Create Project button at the top right-hand corner to create new project.
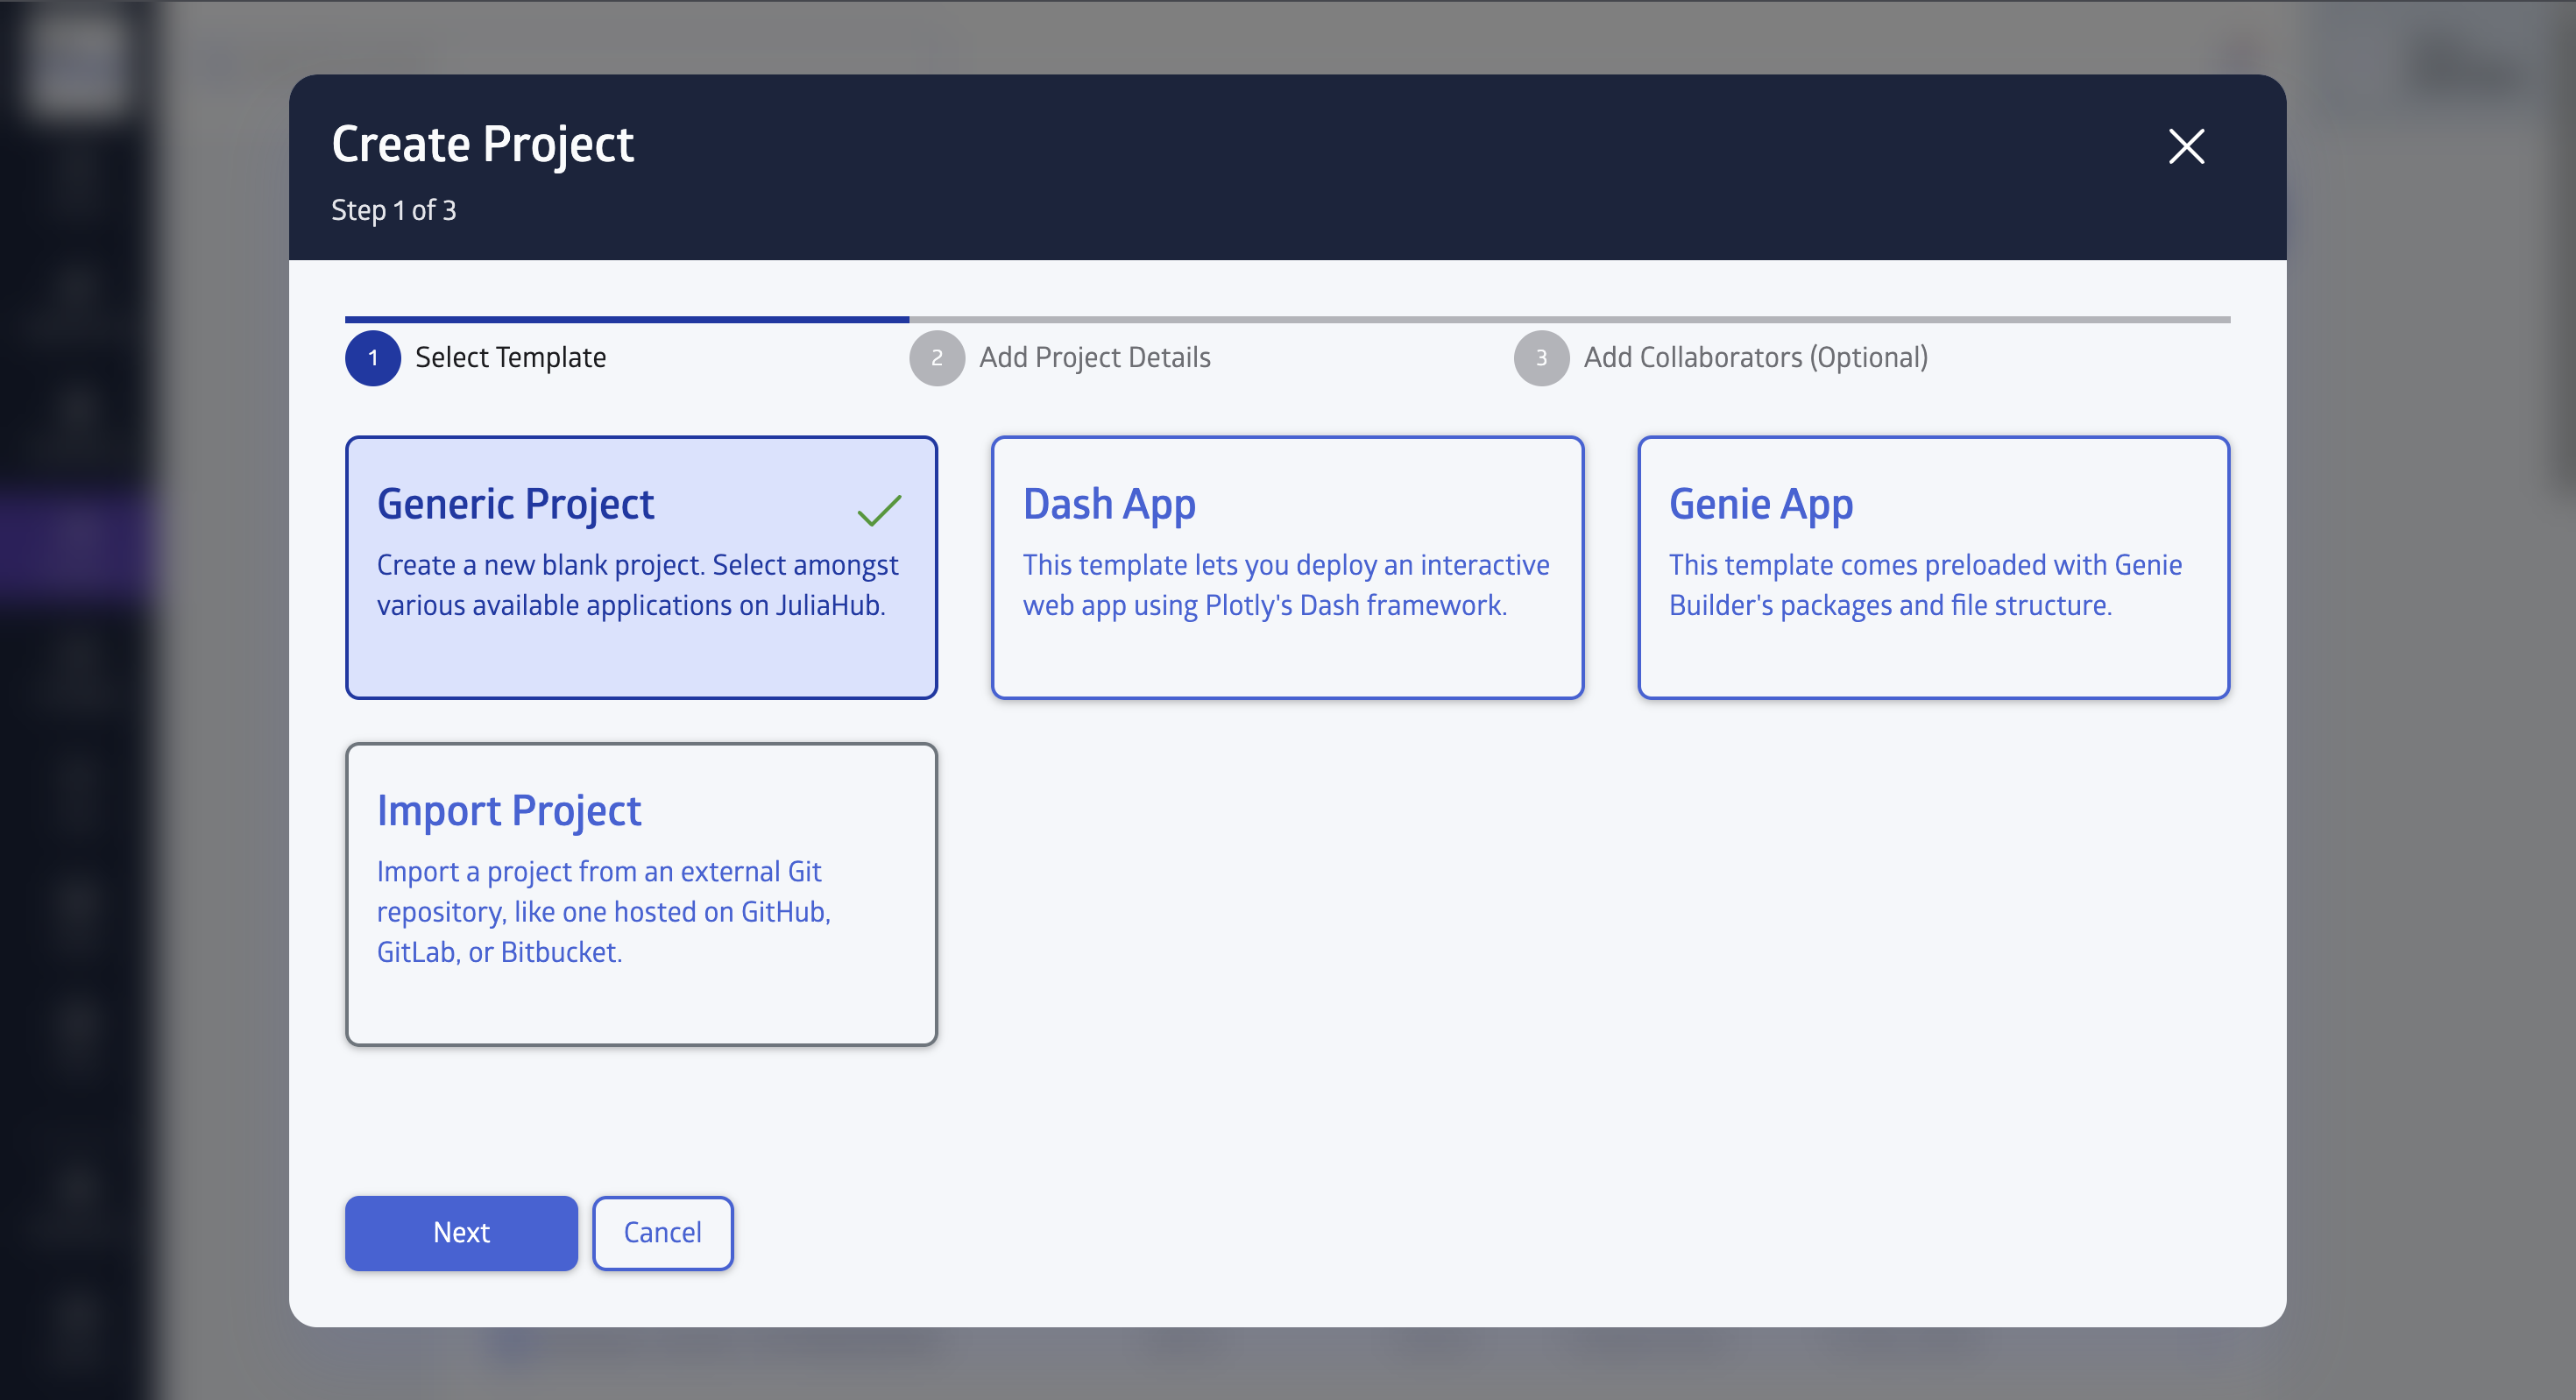
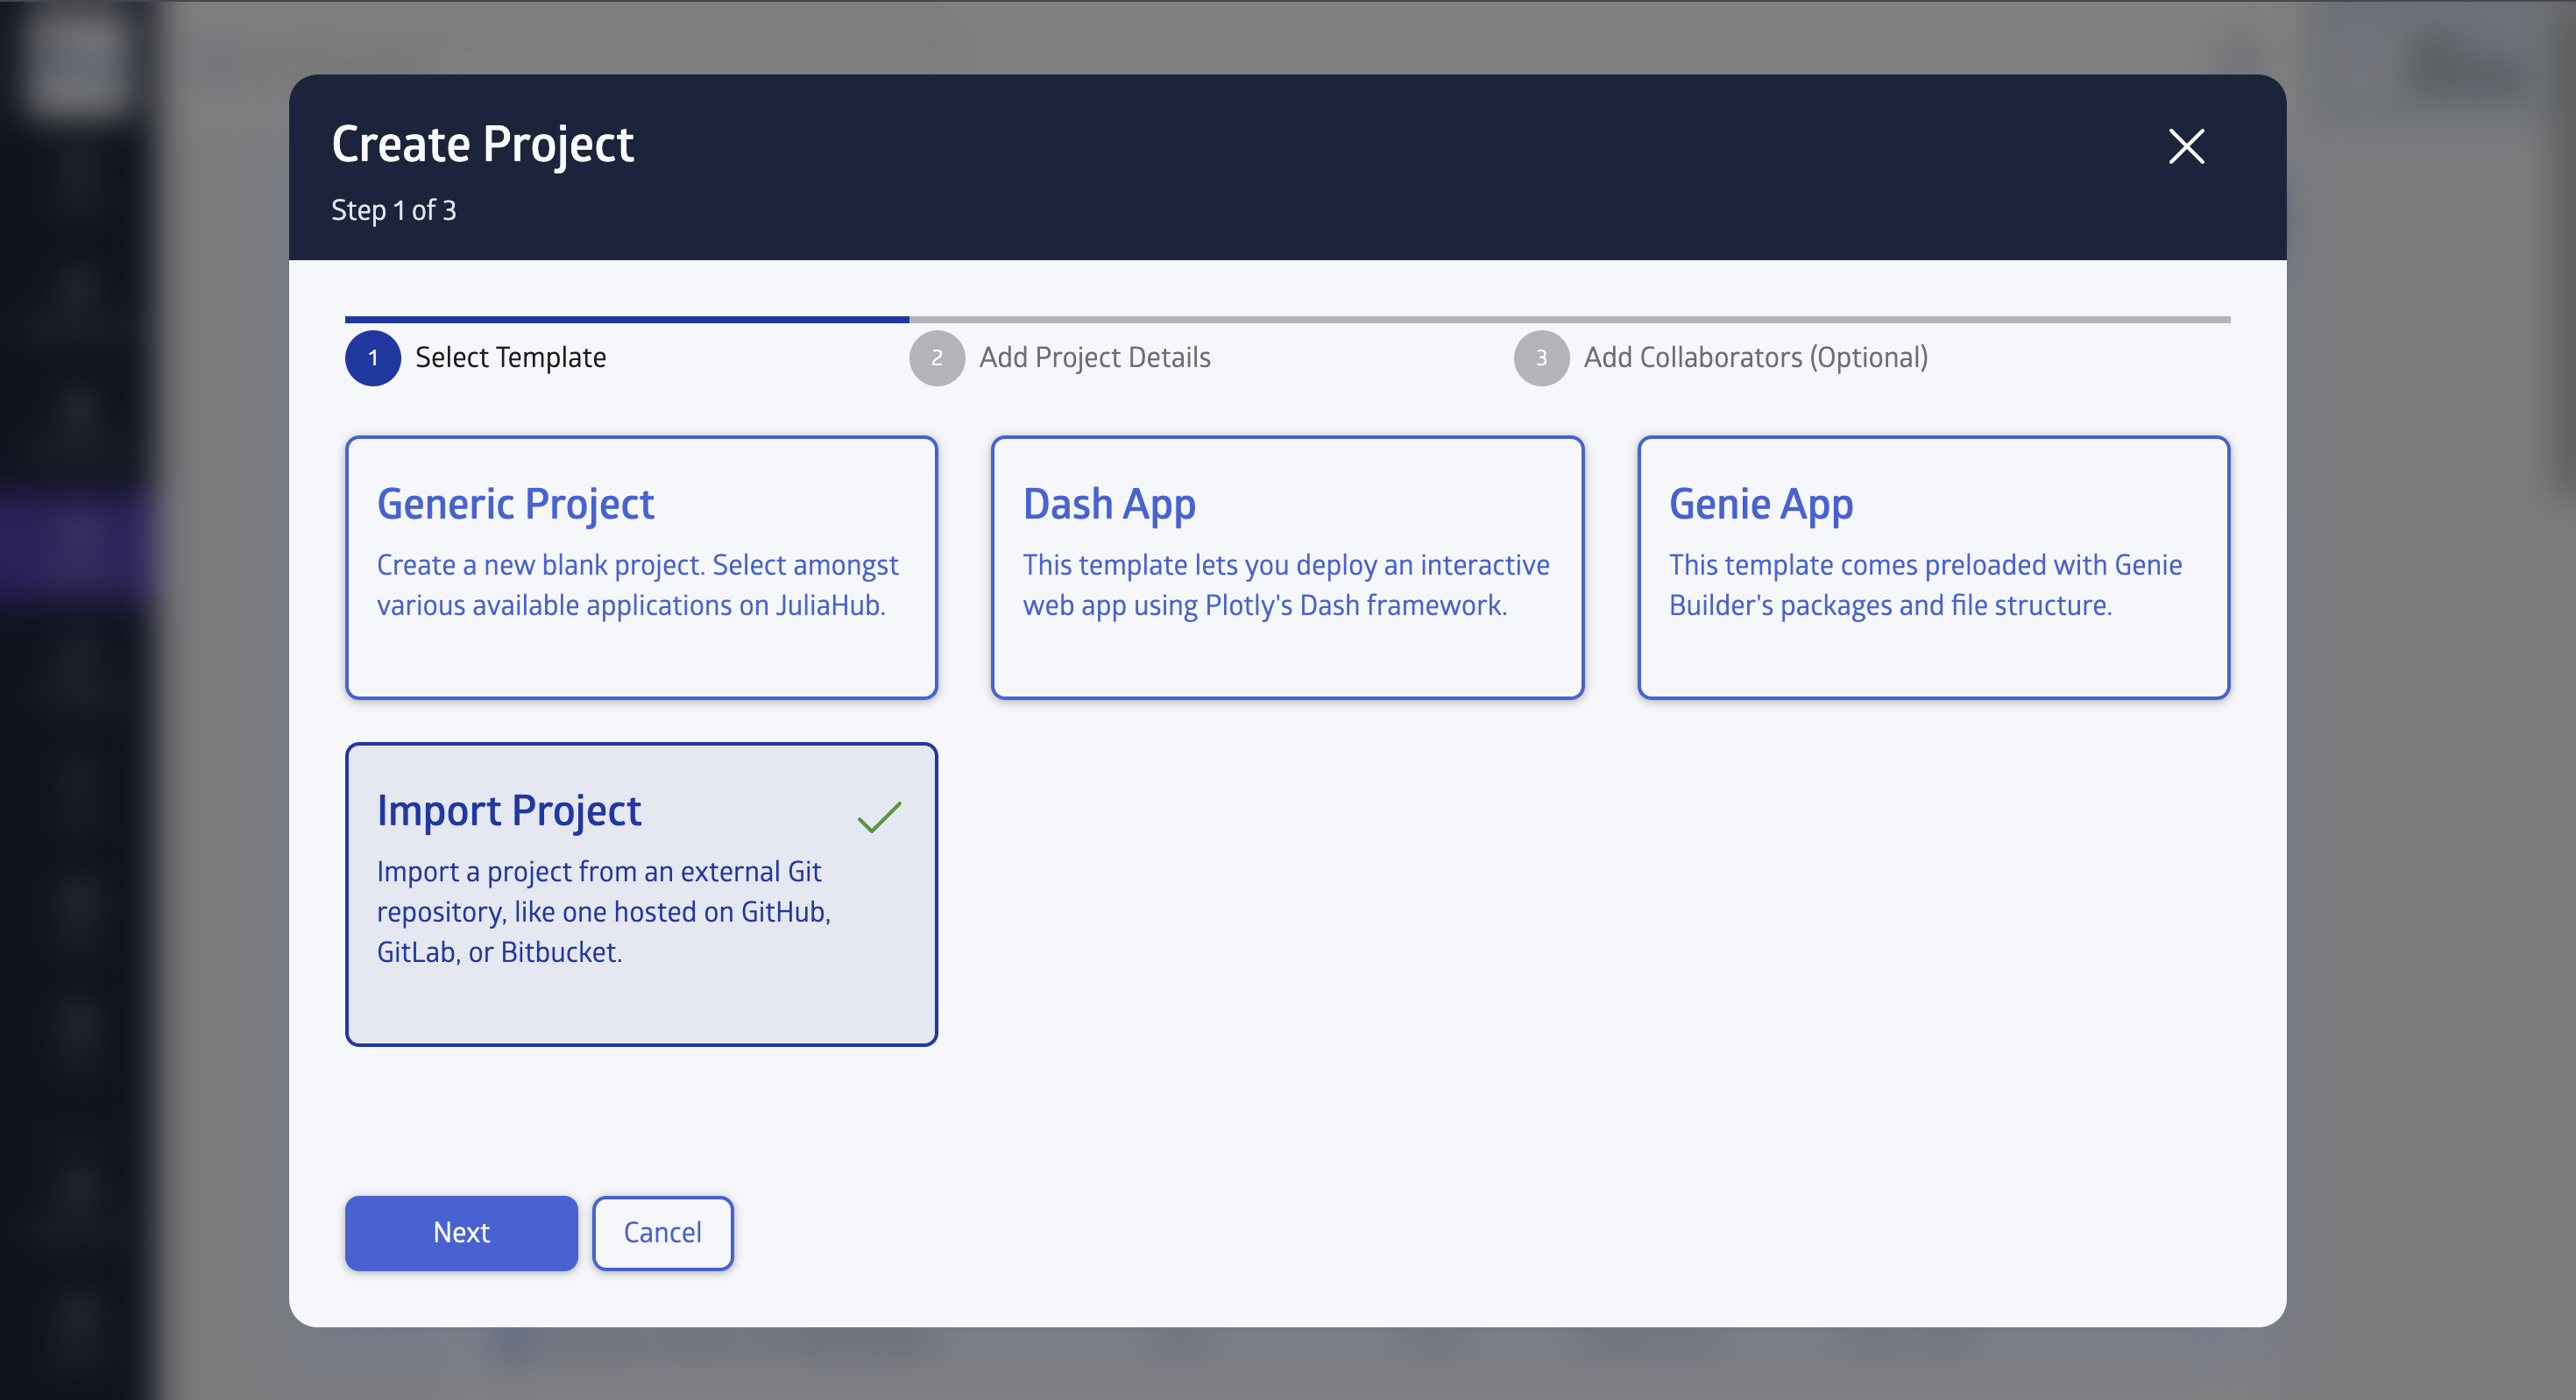
You will need to choose the template if you want. In this tutorial, I have selected Generic Project.
Once selected the first thing you need to do is give your project a name. Next, you can choose to give a short description and provide any tags that will help your team to find this project easily. The next important step is to select which JuliaHub application the project should launch in by default.

Next, you will be required to also specify the workflow (either Group or Exclusive). Group editing lets multiple contributors work on a project at the same time, combining their changes when they are ready. In an exclusive editing workflow, the ability to modify files in the project is delegated to one contributor at a time.
Once selected click Next.
Adding Teams and Users
Projects and the resources that are part of a project are meant to be accessible only by the teams and users you designate for that particular project. In step-3, you will be asked to add team members to the project and select how your organization as a whole can access the project. Add groups or individual users to the project and use the dropdown to change the kind of permissions they have using one of our default roles. The default roles are:
- Viewer: can view content, but has no other permissions (no edit or write access)
- Editor: just have read/write permission on files, but cannot create projects or folders
- Owner: can modify, rename, and archive projects
You can change this information later, even after the project has been created. You can give general access which will be for the whole team or can provide individuals with the specific access.
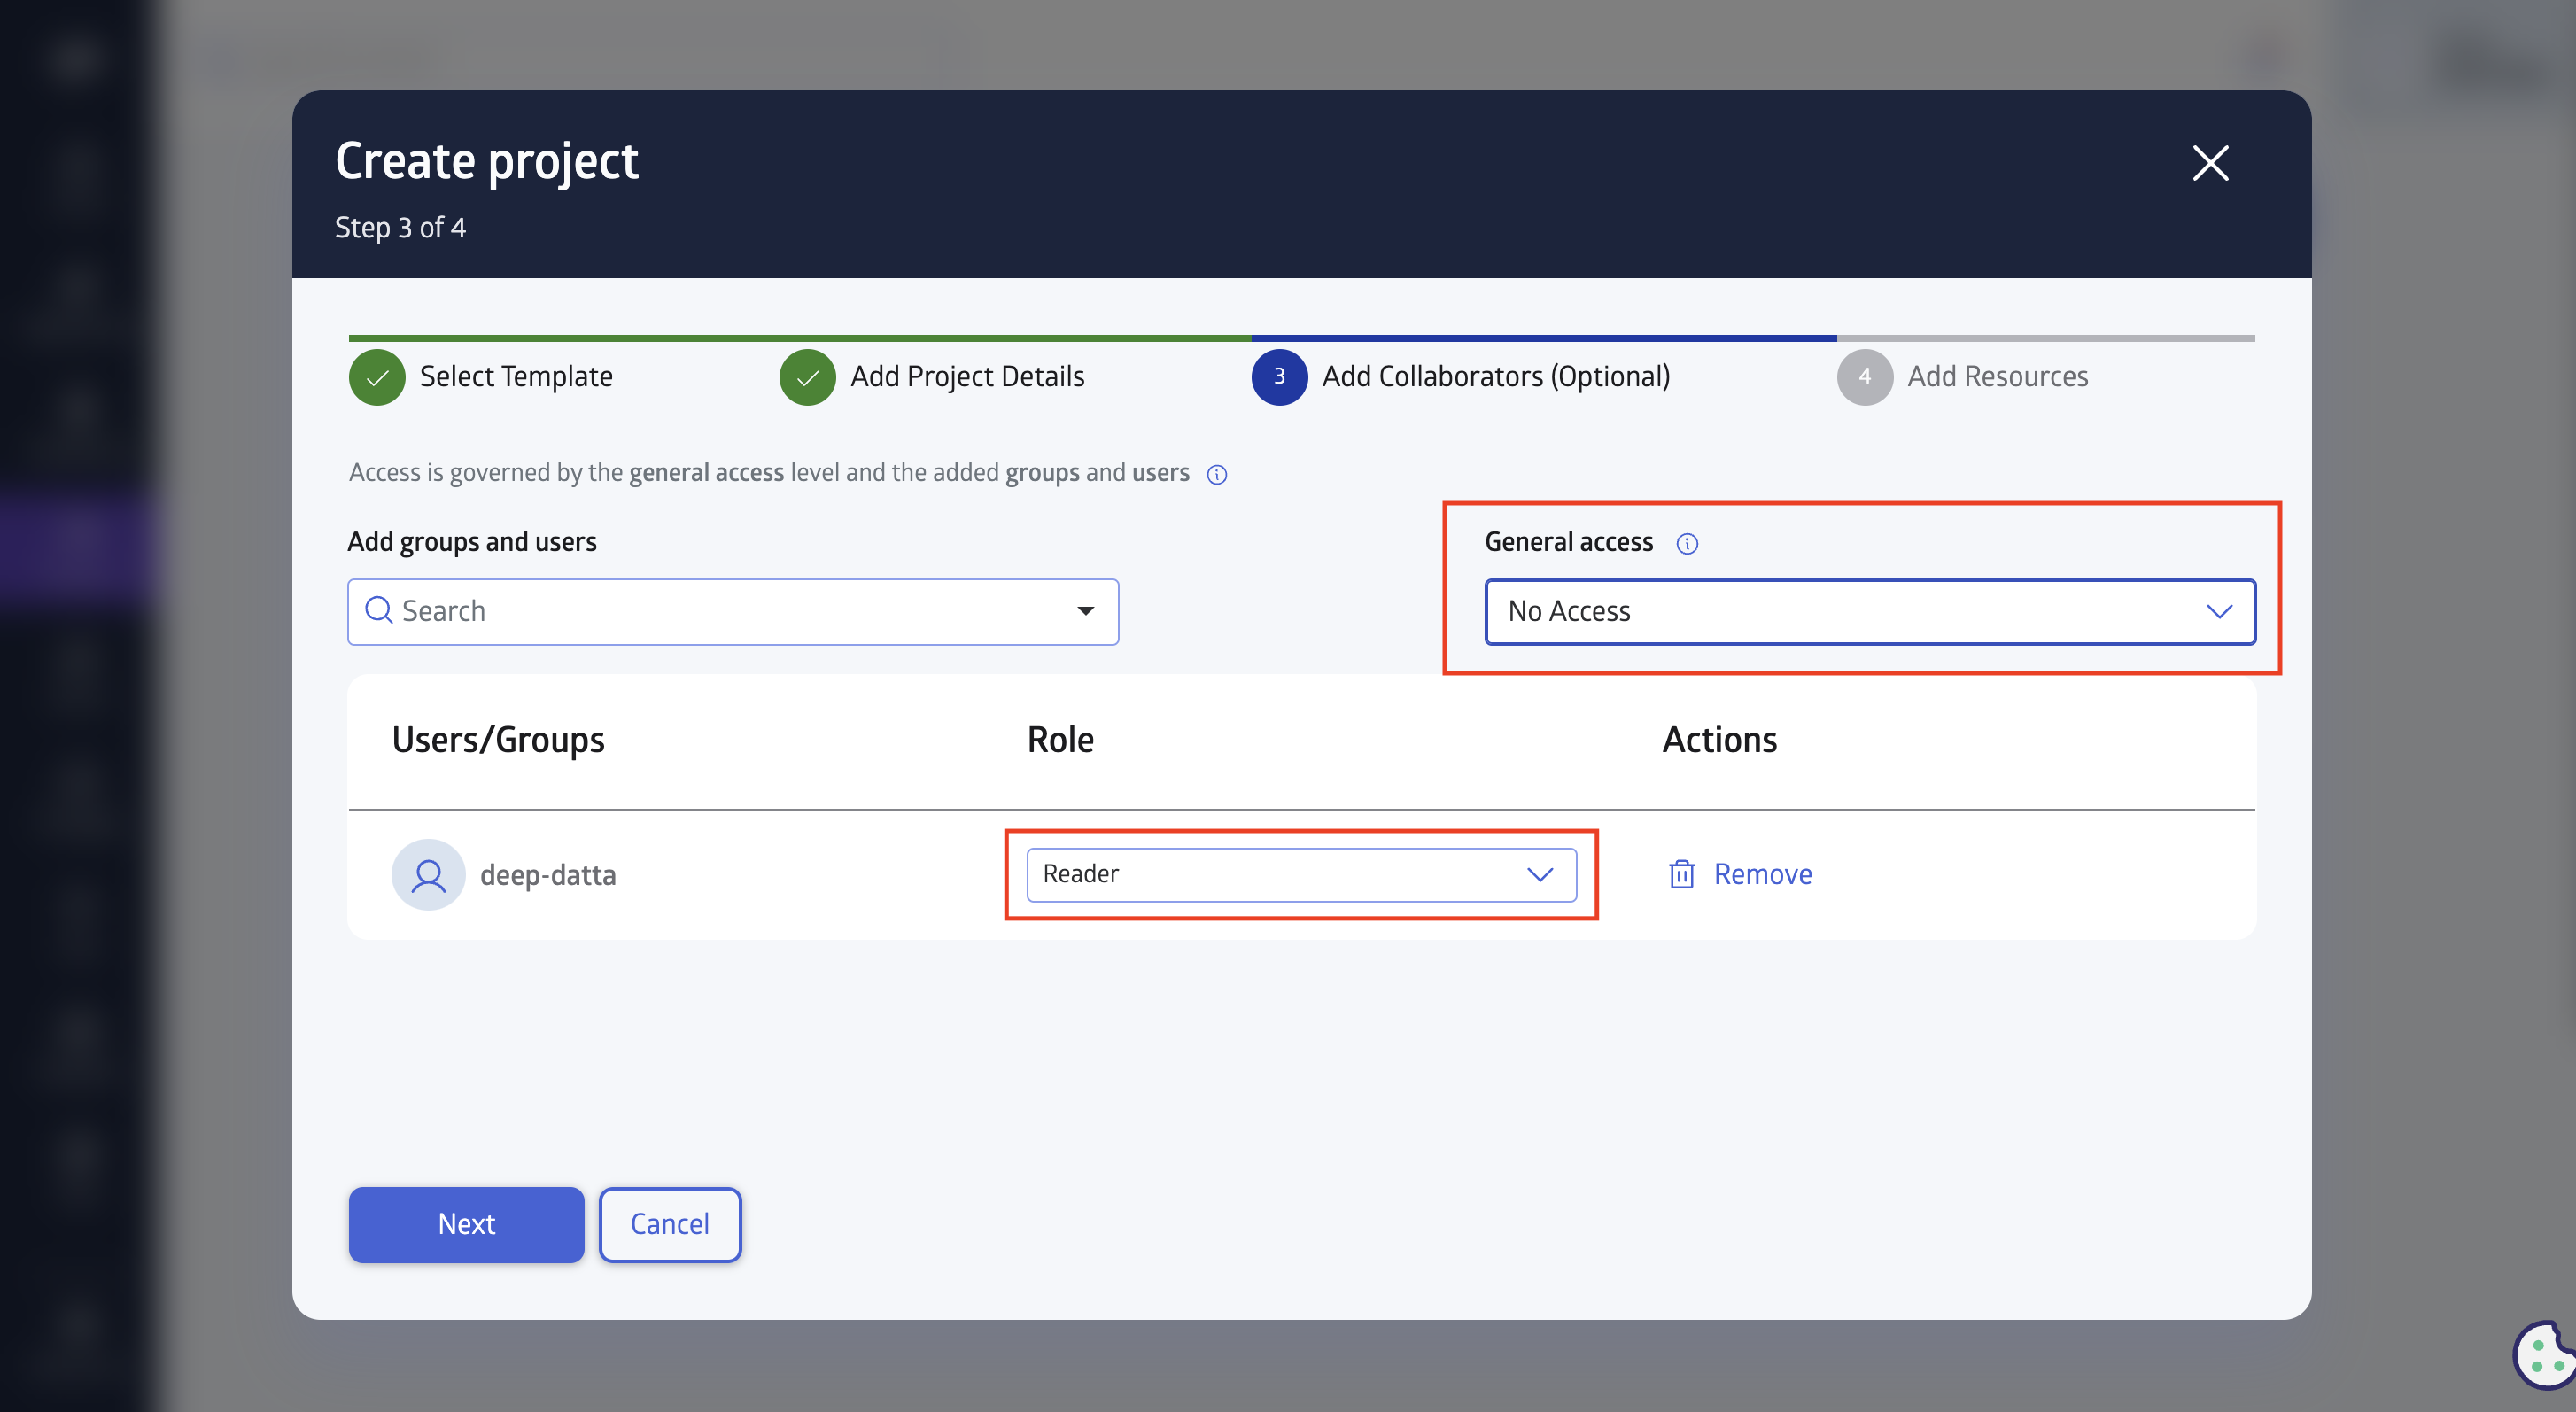
When you are done, hit Next.
Directories (Repositories)
The last step in a project is creating a directory (also known as a repository). There are two kinds of directories that can be created. The first is a code/general directory that houses all of your files, folders, and packages. The second kind of directory is a data directory where all datasets are stored. You can think of a directory as the top-level structure of a project (similar to a GitHub repository). You can have one or multiple directories in a project. Currently, a project will not launch without a directory.
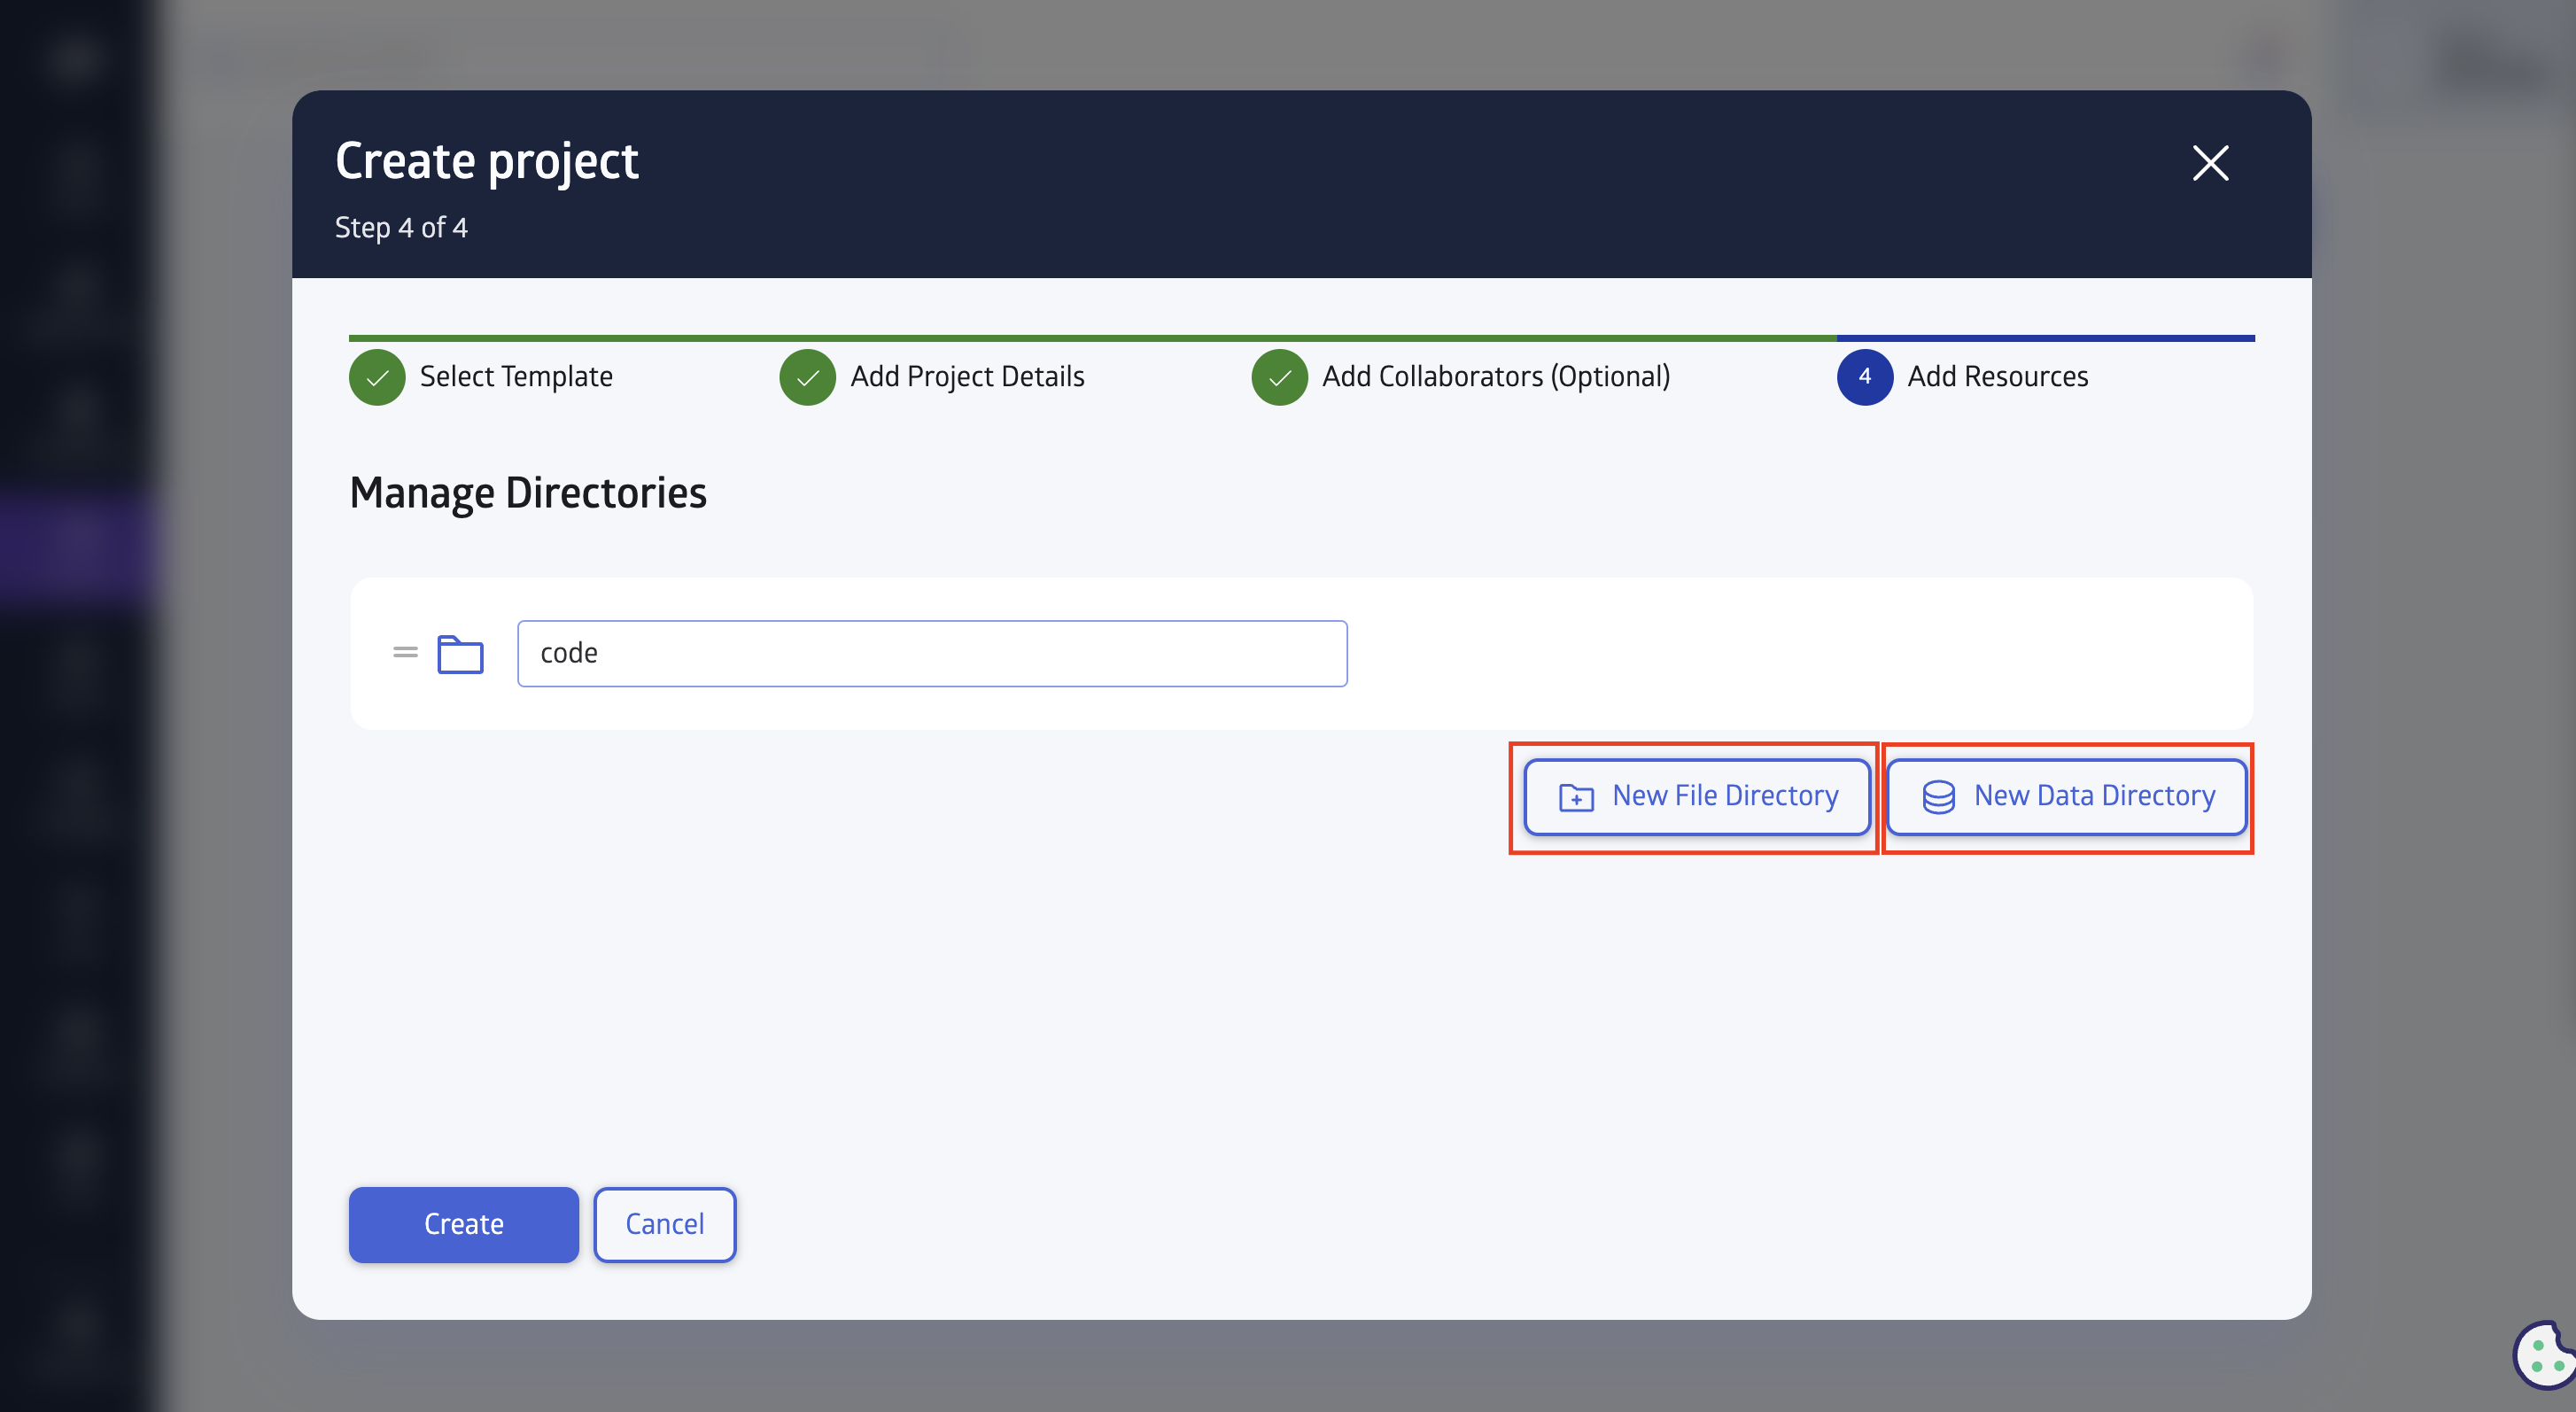
Name your directories and, when done, click on Create button.
Note: You can upload files directly to the directory in the UI, but right now, folder creation is limited to the IDE. Once you launch the JuliaIDE, you can add folders and subfolders to your top-level directory.
Explanation of General Directory vs Data Directory
Directory Type: Code/General
The contents of a general directory are stored in an S3 bucket, which can hold various kinds of files such as packages, text files, images, and more. You can think of a general directory as of a repository on GitHub.
Directory Type: Data
The data directory is meant to store datasets. Datasets provides Julia programs a way to map information to a database. When working with file types that are meant to be associated with data such as CSVs, XMLs, and JSON files. The best practice is to add them to the data directory.
Navigate back to Projects tab so see your new project.
Launch in JuliaIDE
Once your project that has been successfully created with a directory, you can launch the project with the default application by hitting the Launch button.
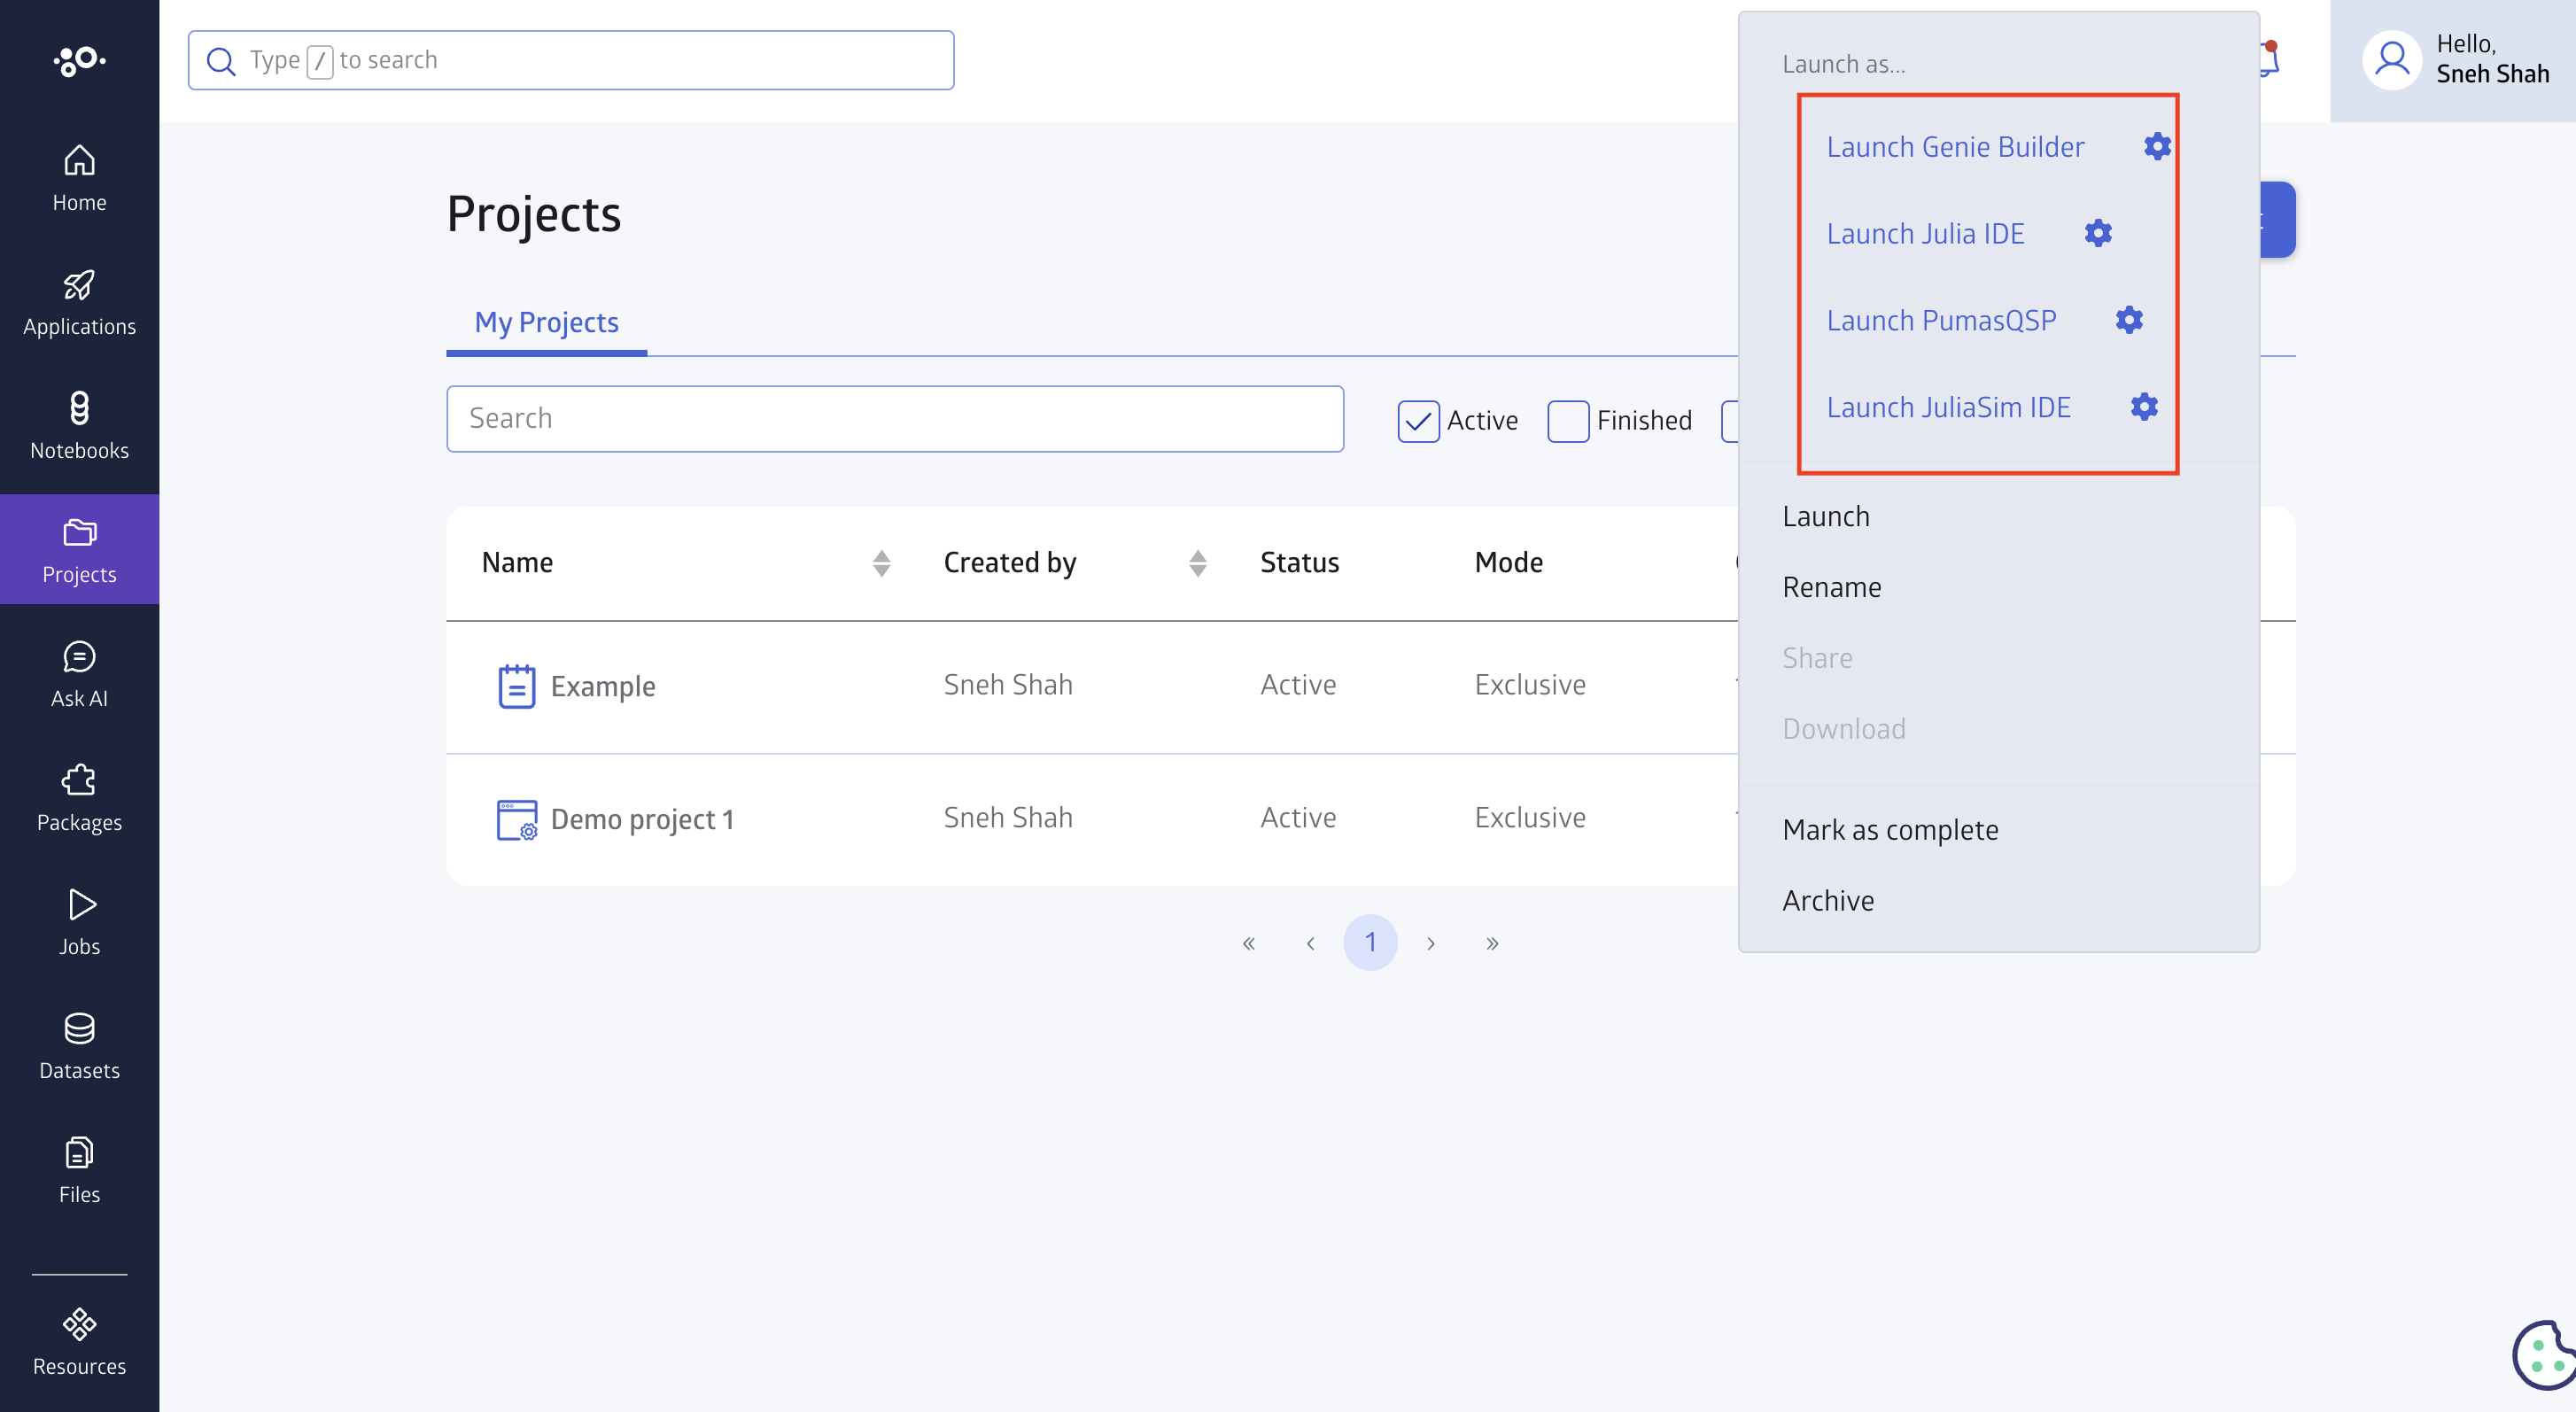
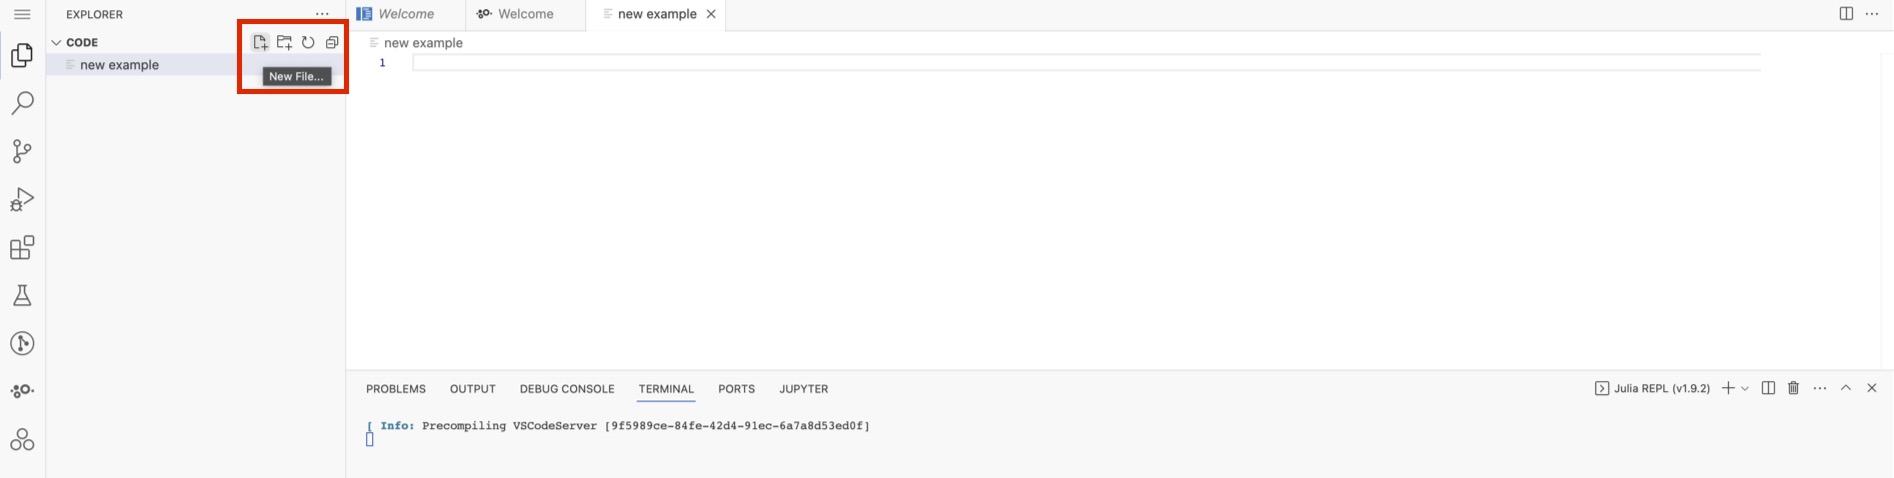
Here is an example of a project with an empty file:
Importing a Git Project
Importing your existing project to JuliaHub is very easy. You can import your project from external Git repositories.
To import a project go to Projects tab from the left menubar.
Click on the Create Project button at the top right-hand corner to create new project.
Hit Import Project as shown in the image below and then click next.
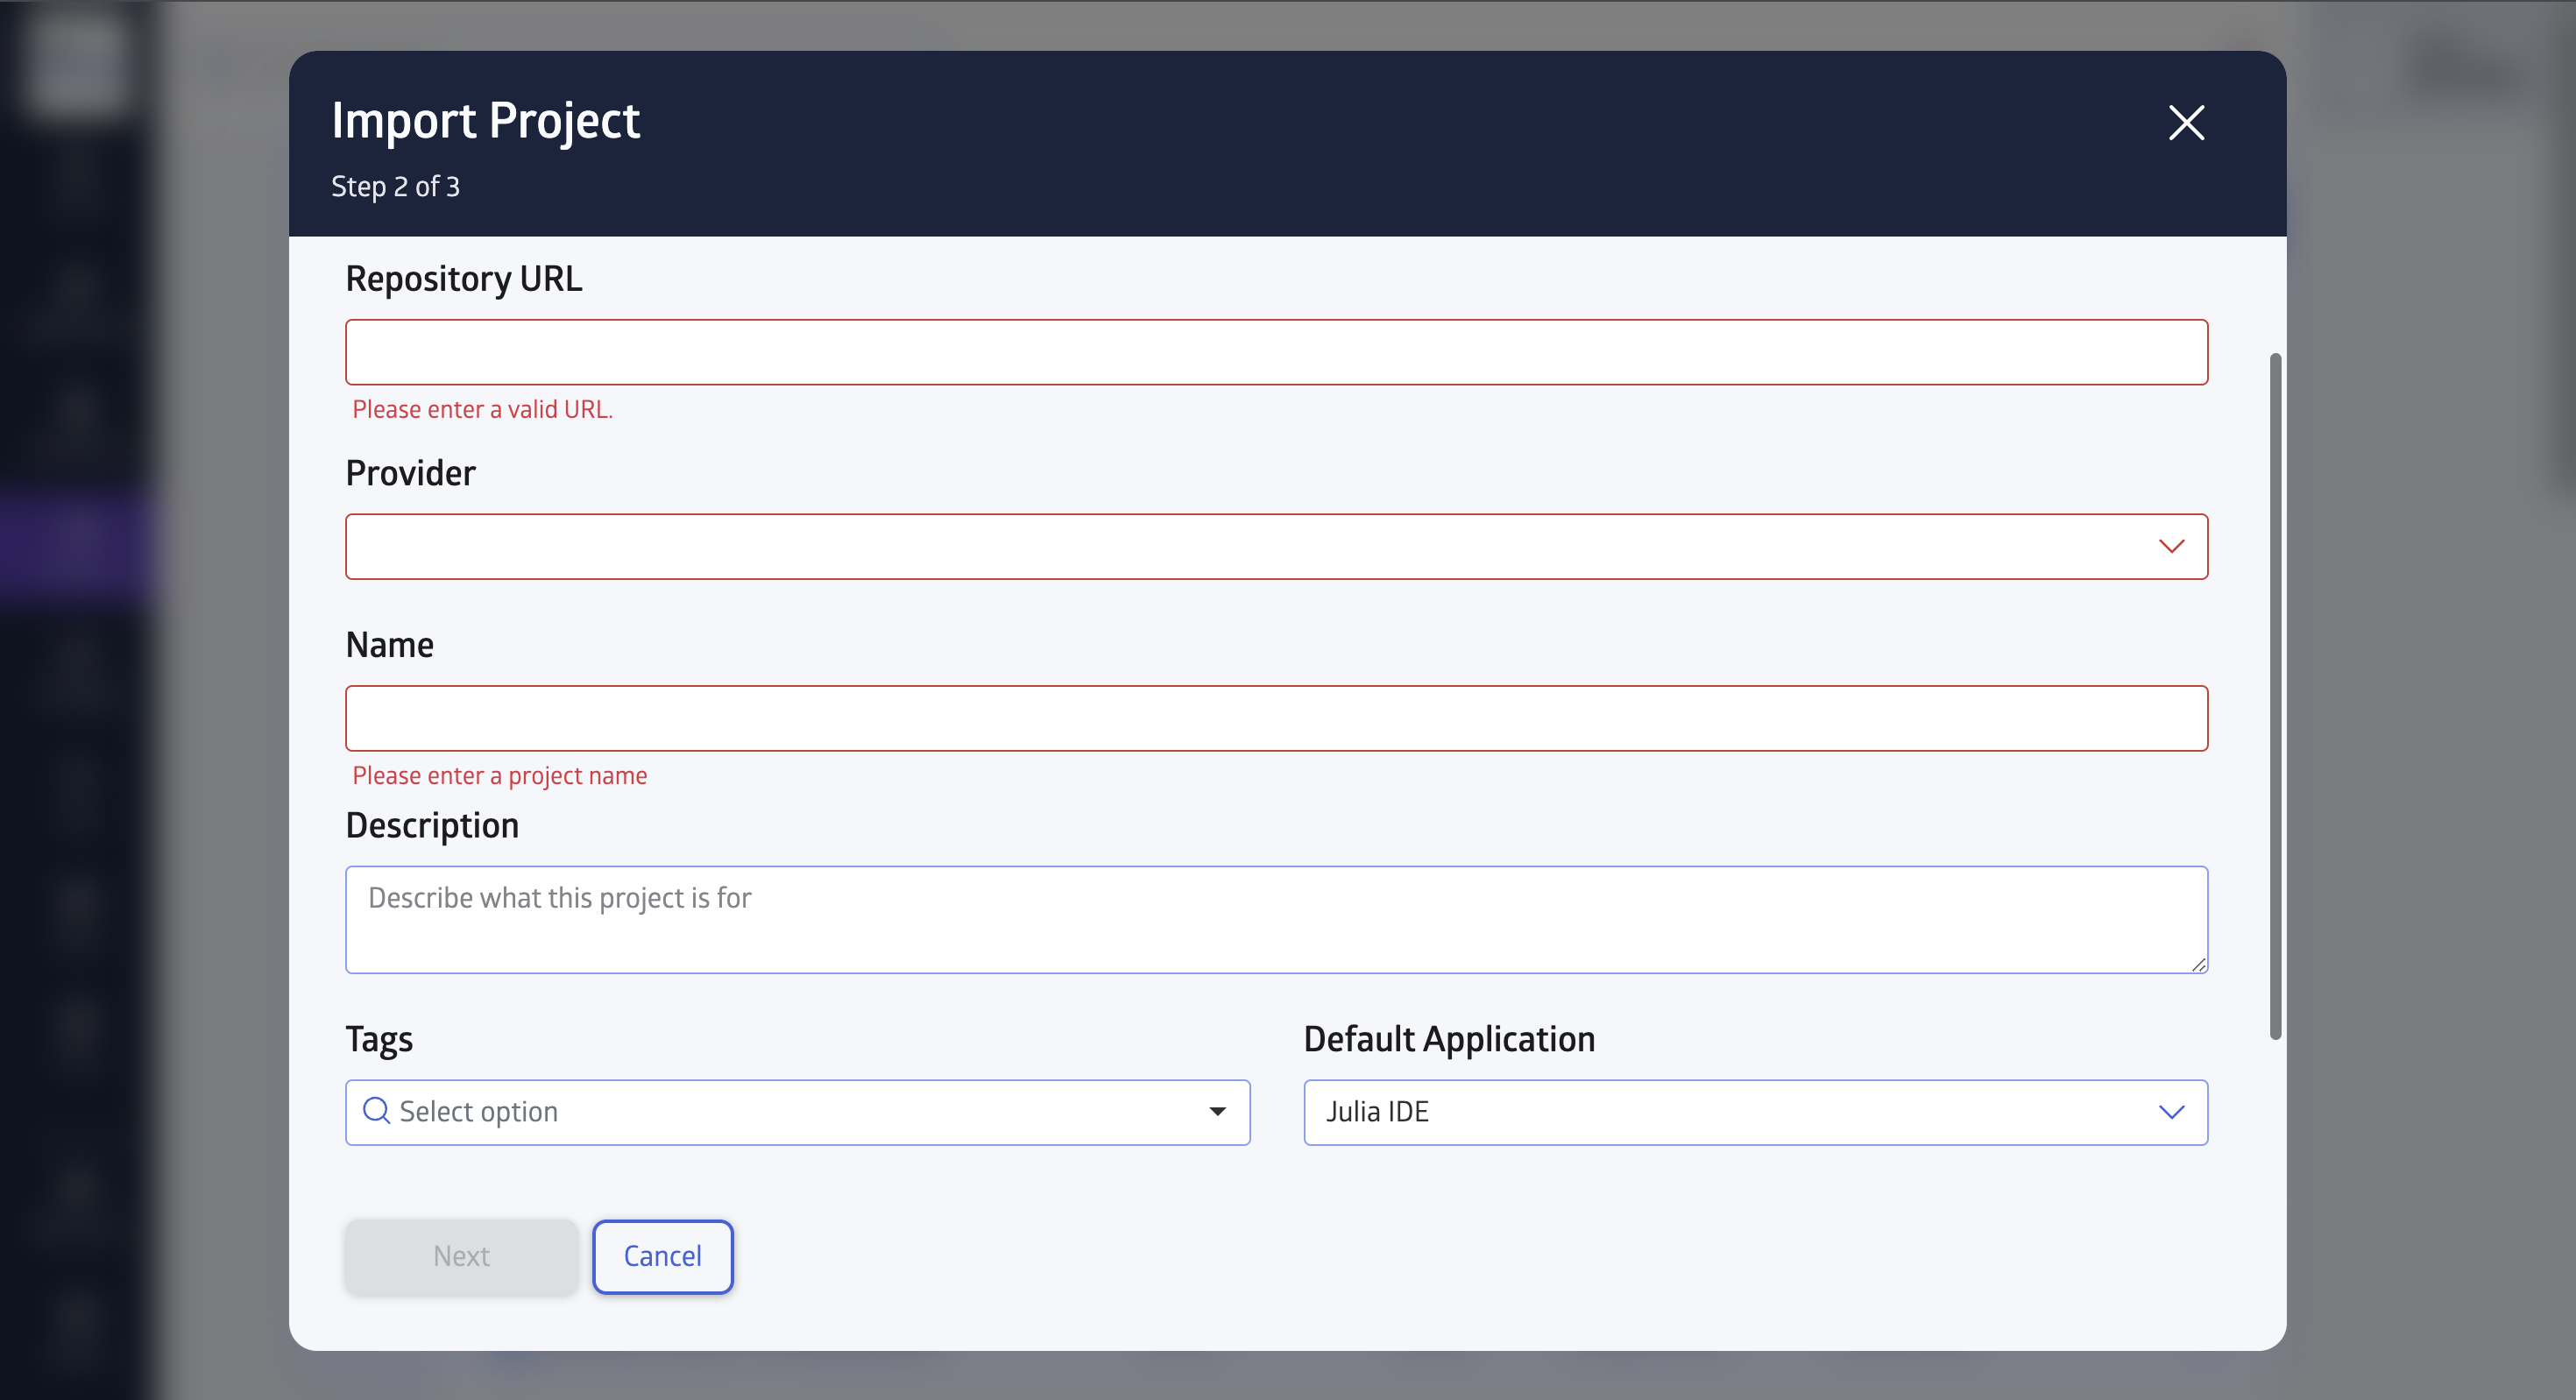
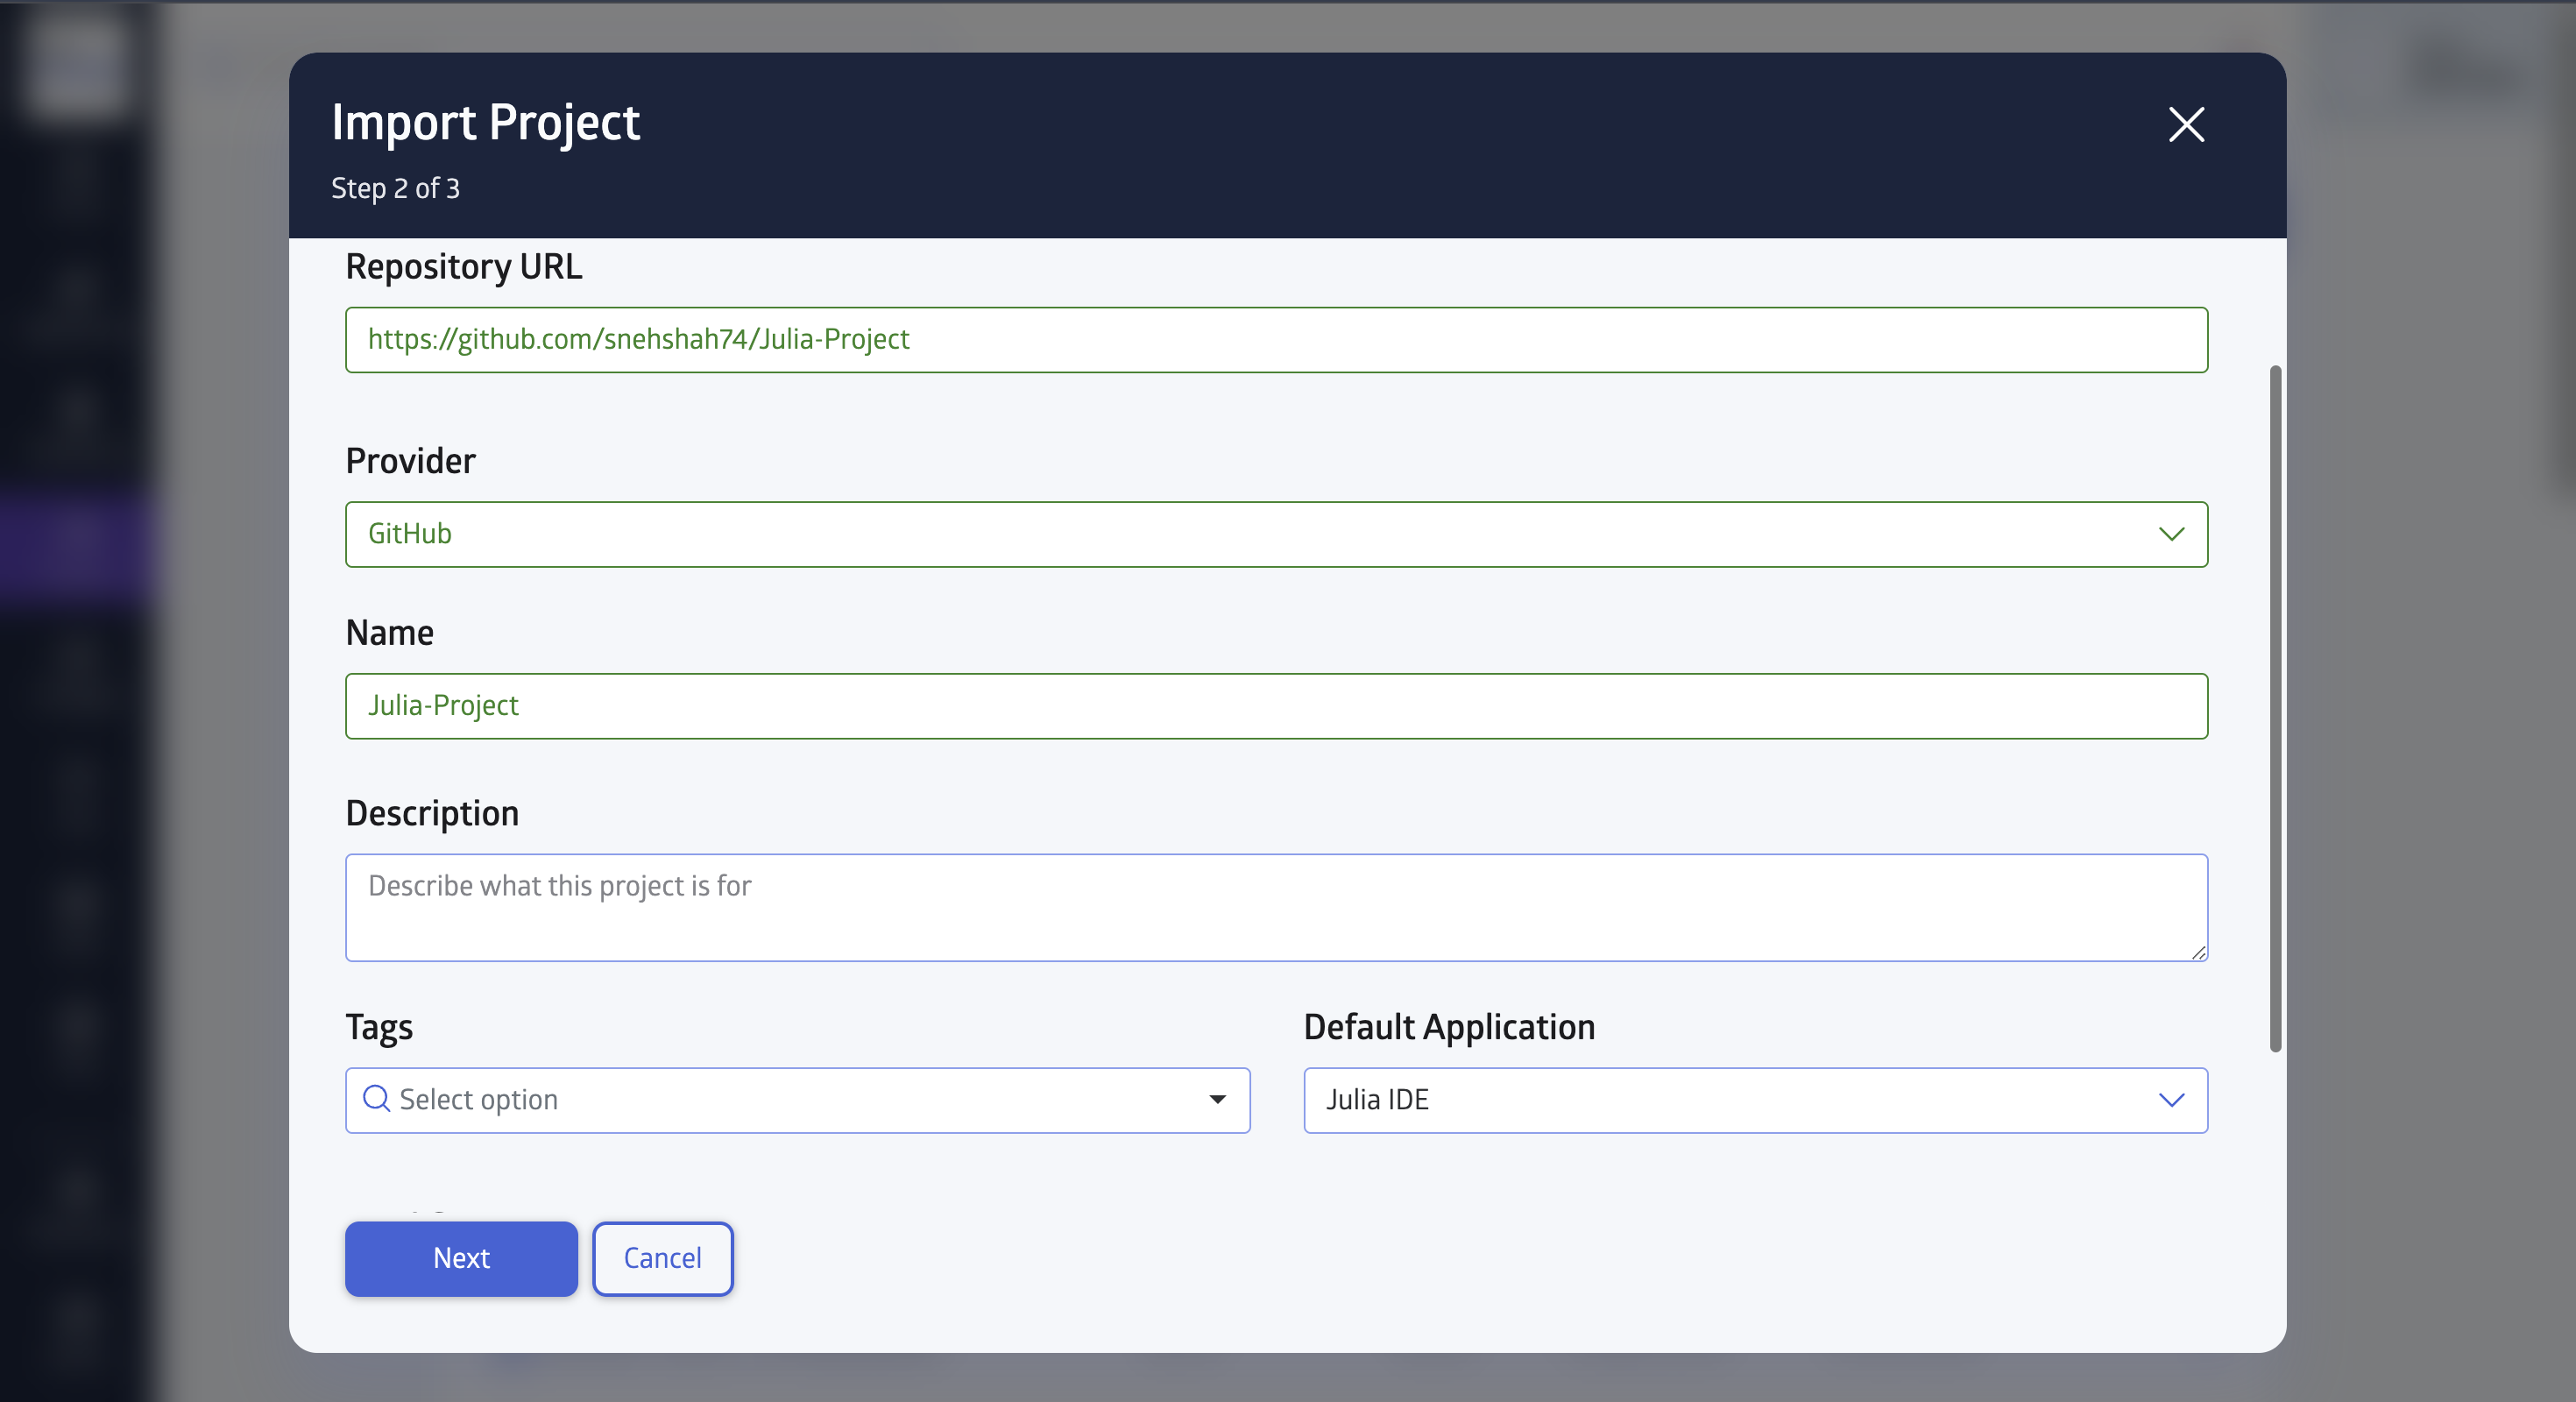
In the next step, you will be asked to provide the Repository URL, Provider and Project Name.
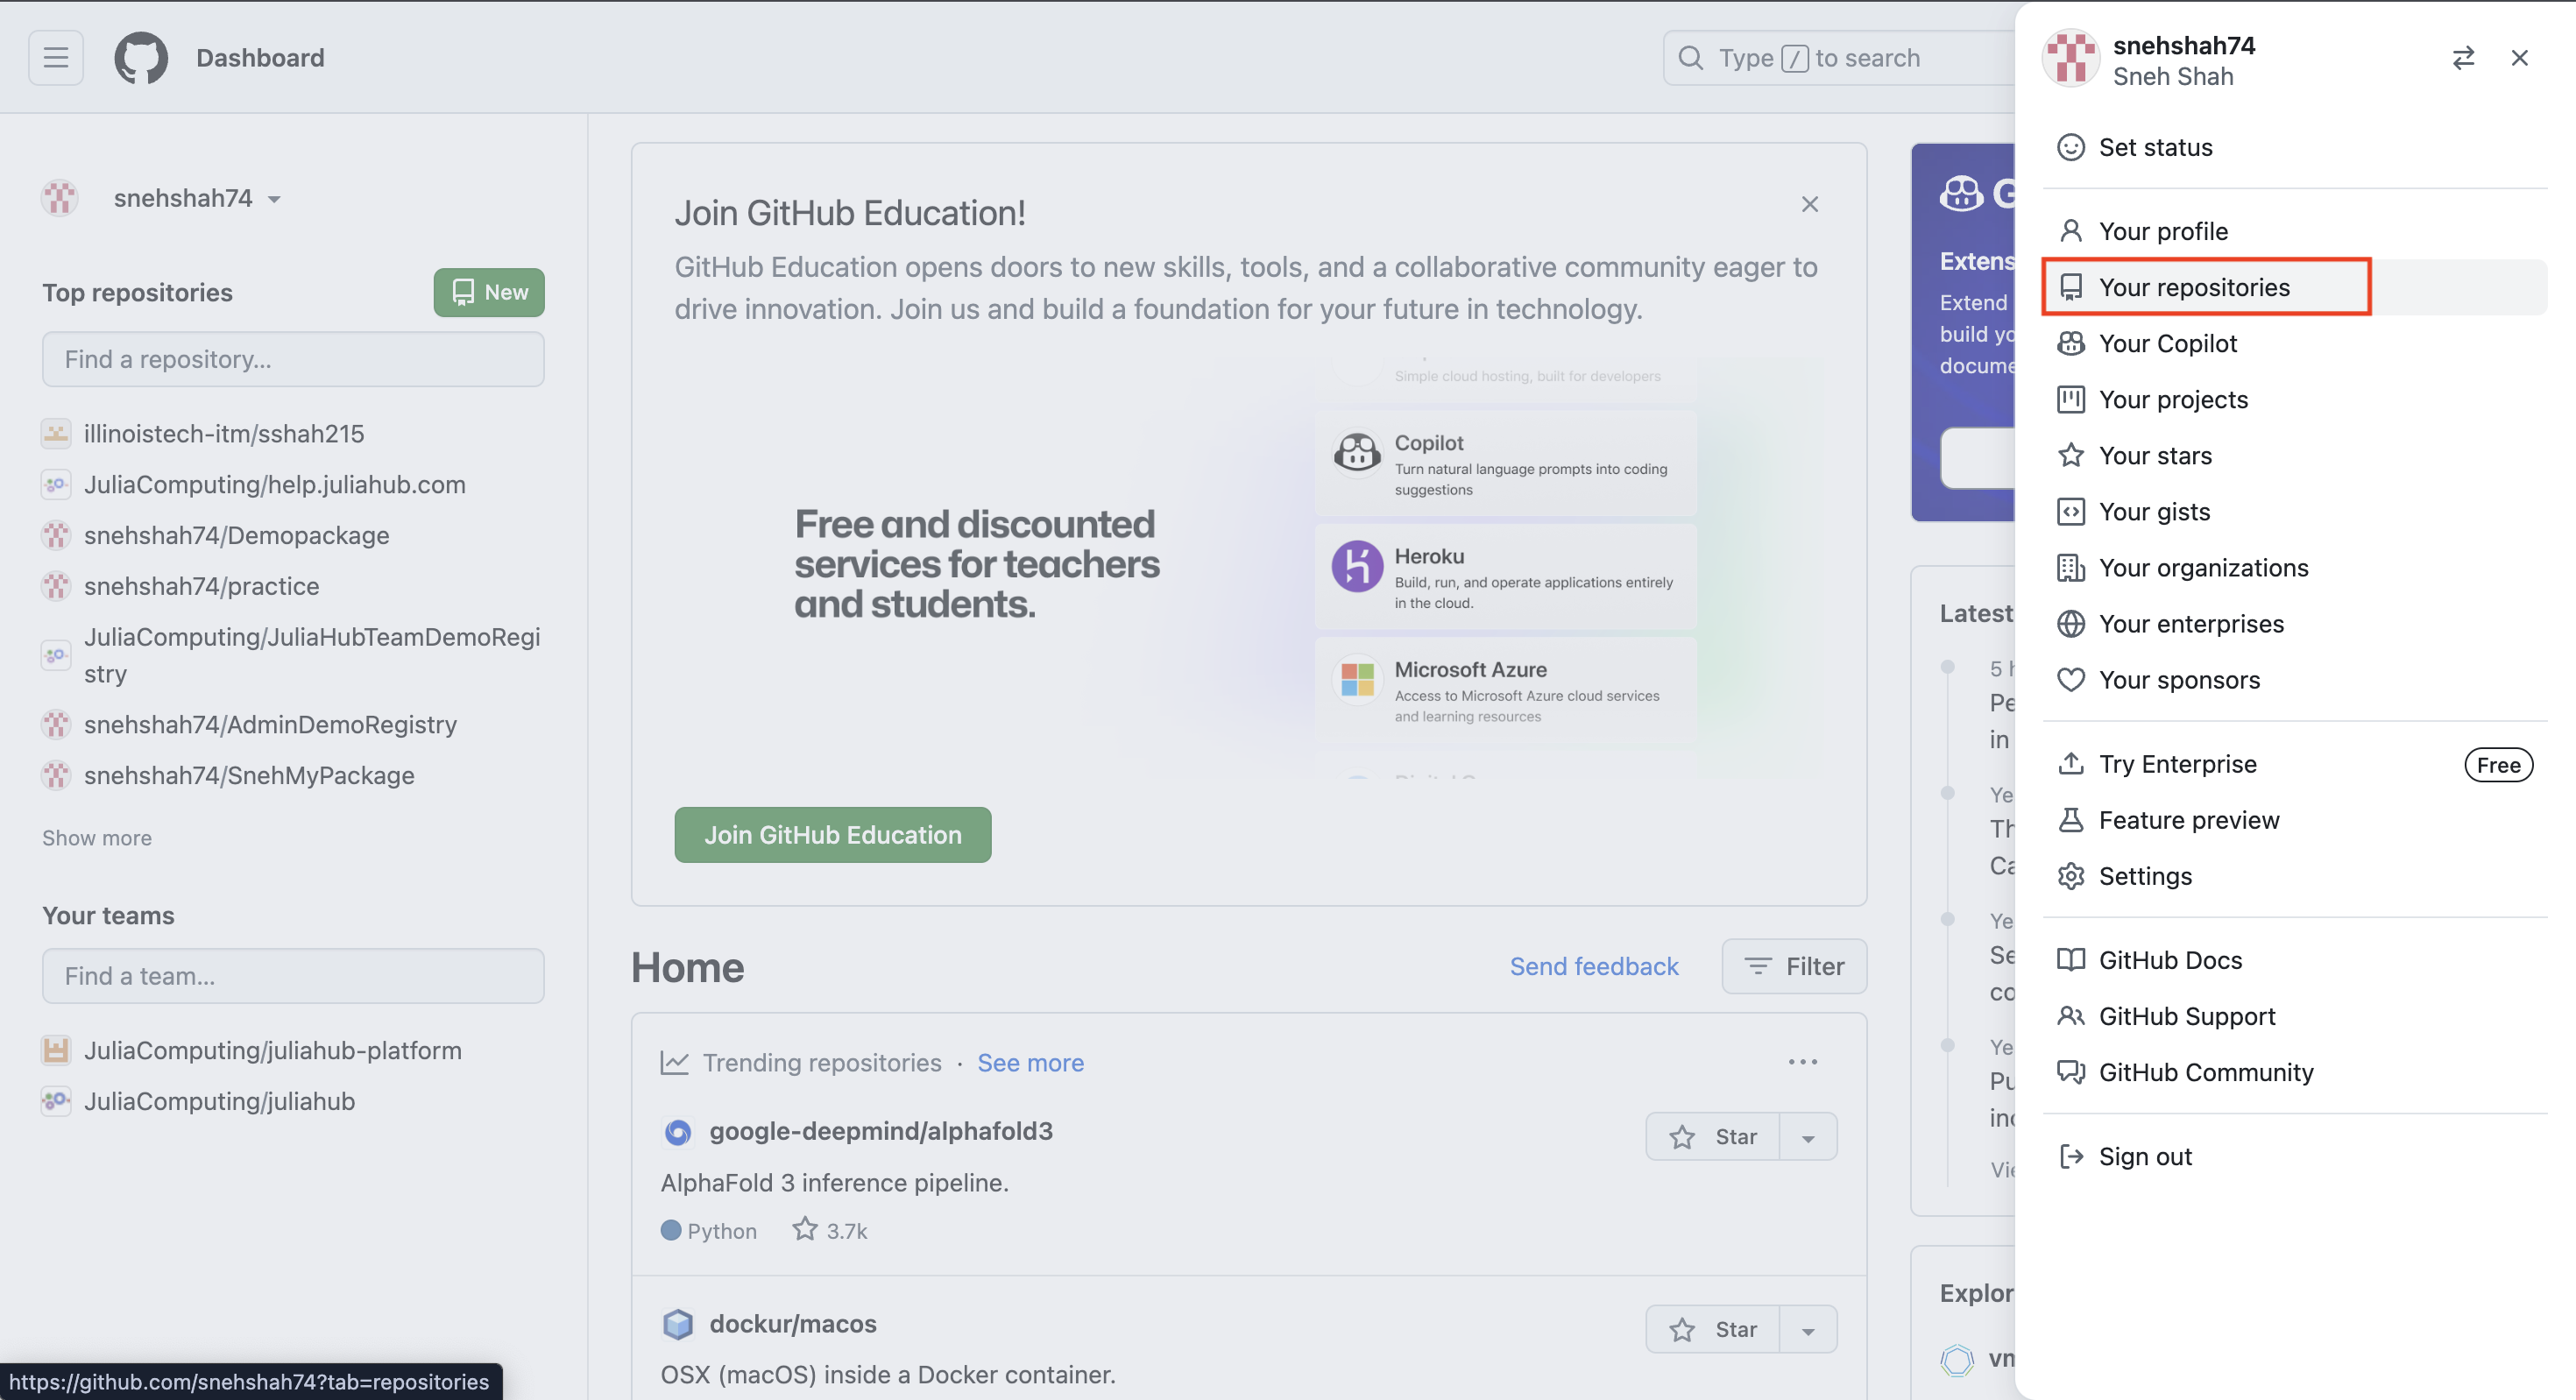
Navigate to your github account and click Repositories from your profile section so see all your repositories.
Select the repository you want to import and copy the URL as shown in the below image.
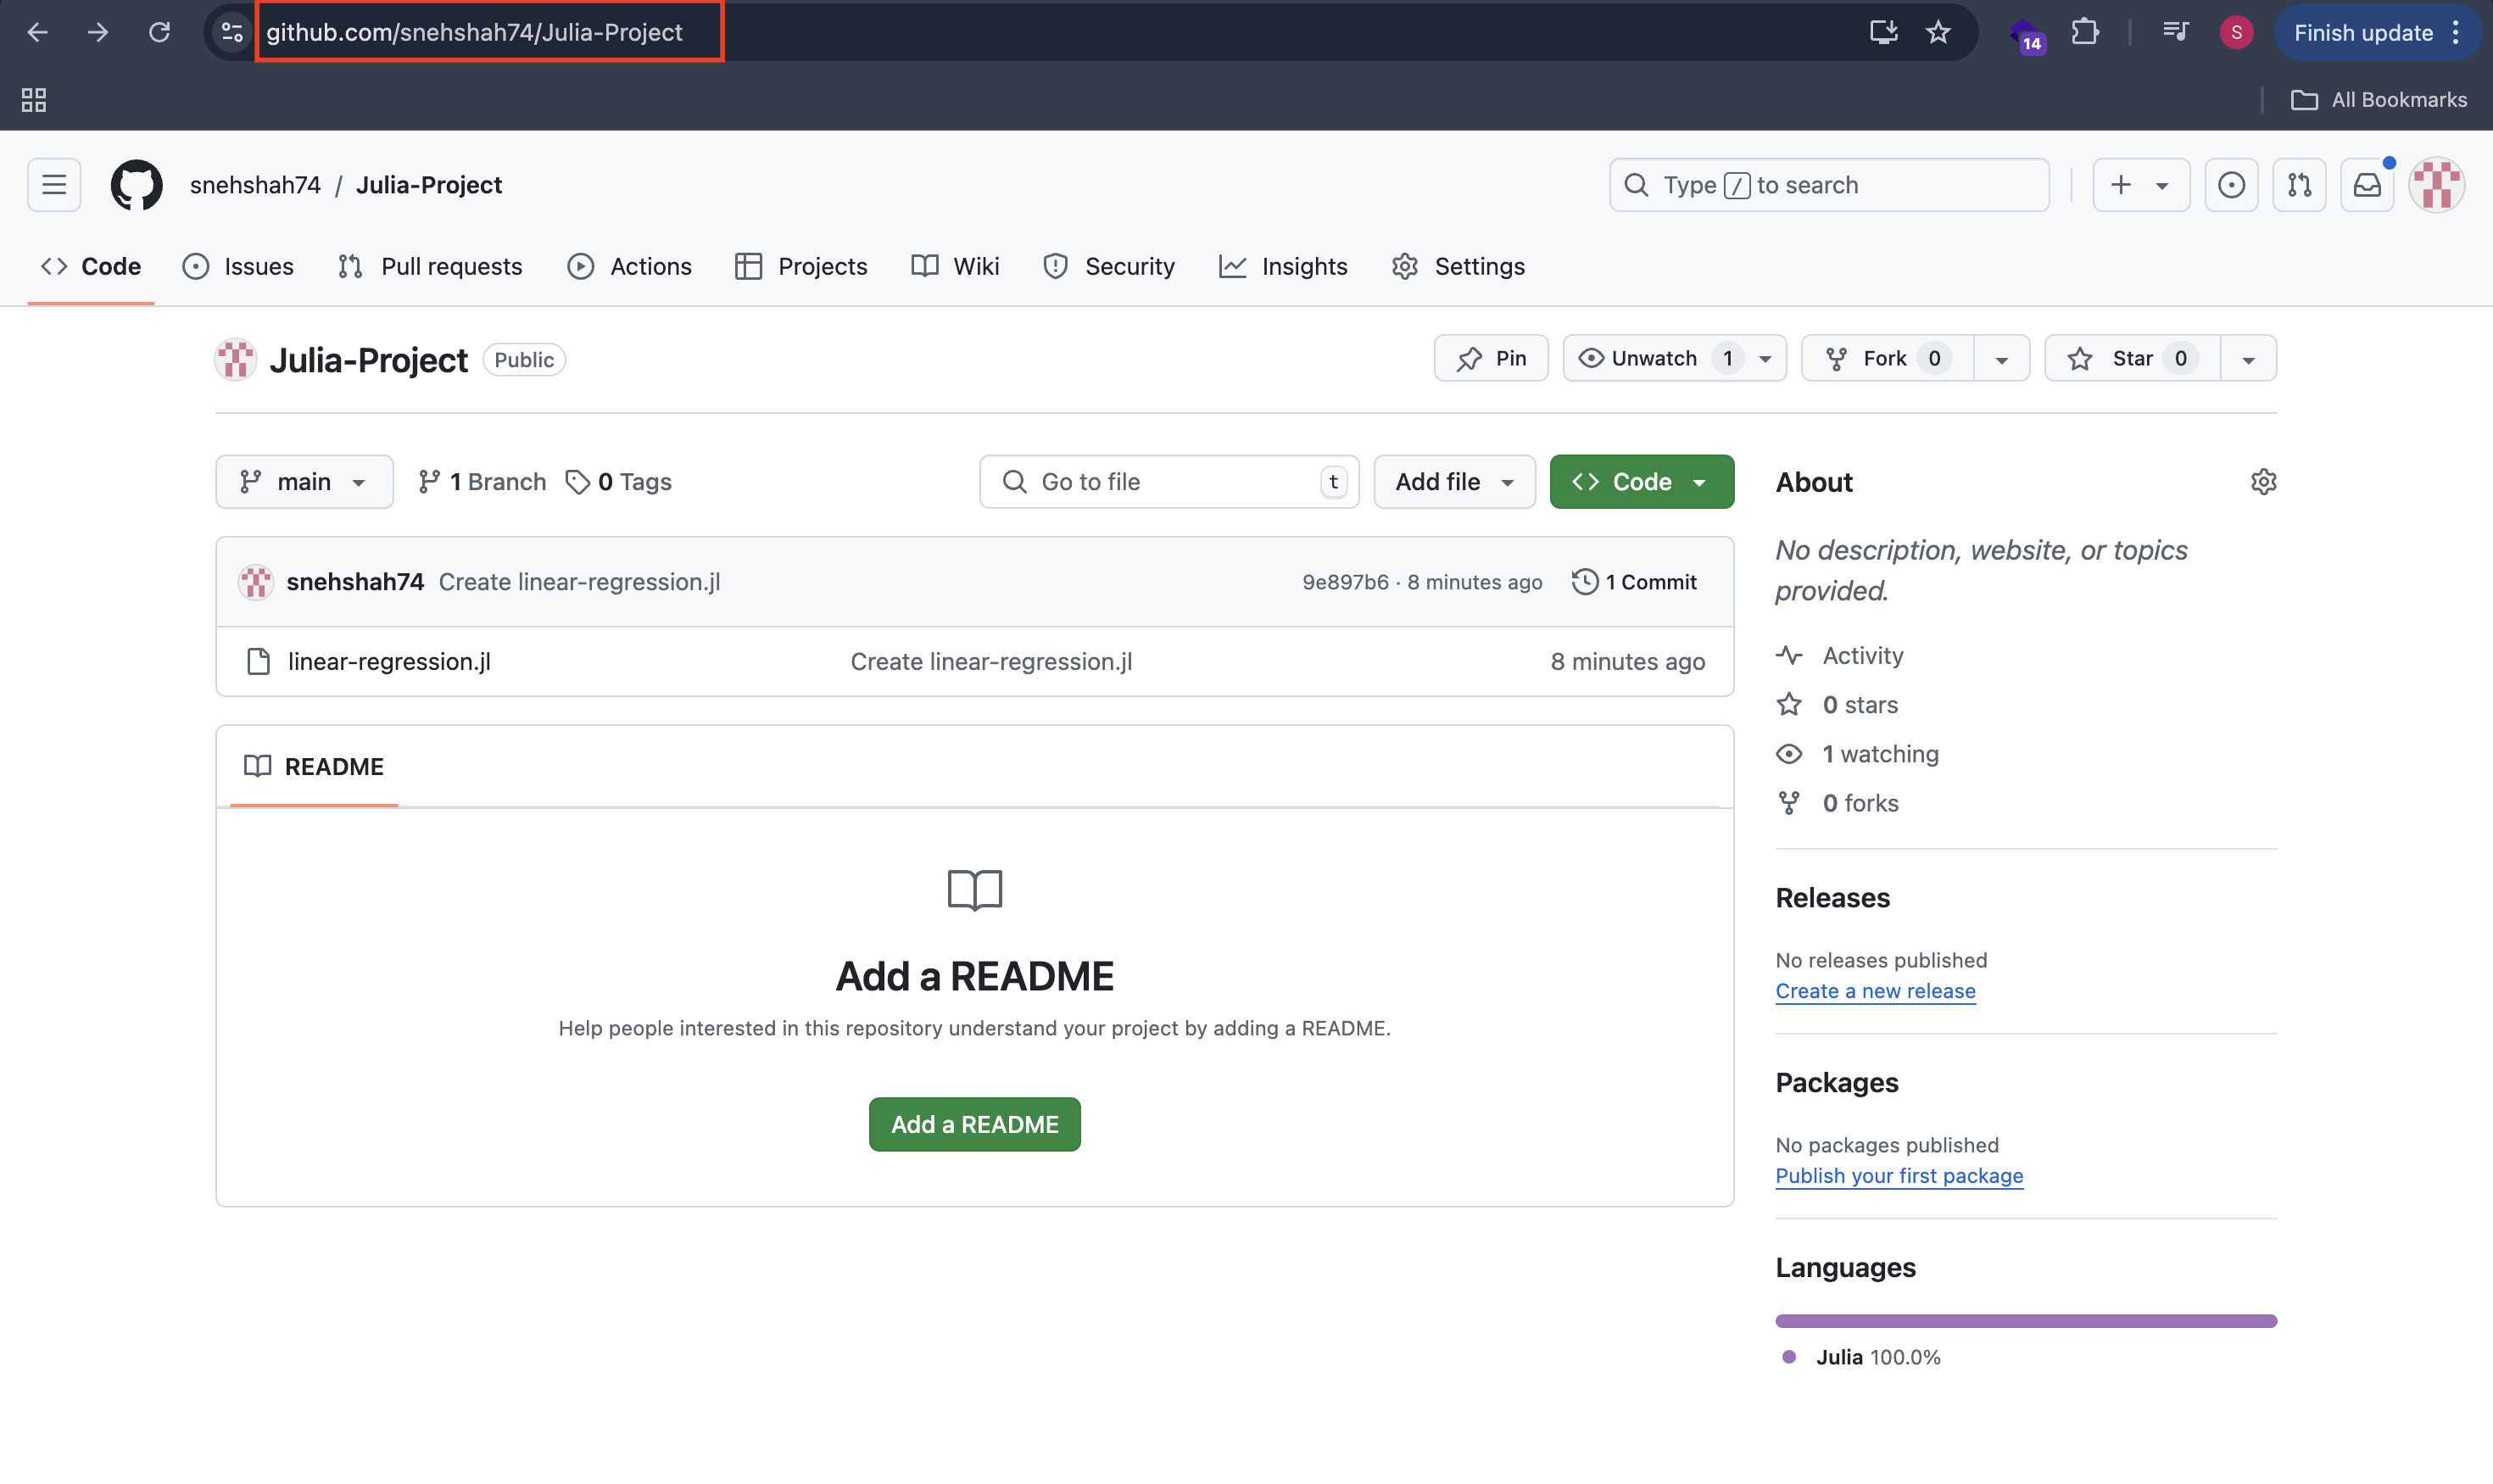
Go back and Paste the URL in Repository URL and it will auto-fetch the Provider and Project Name.
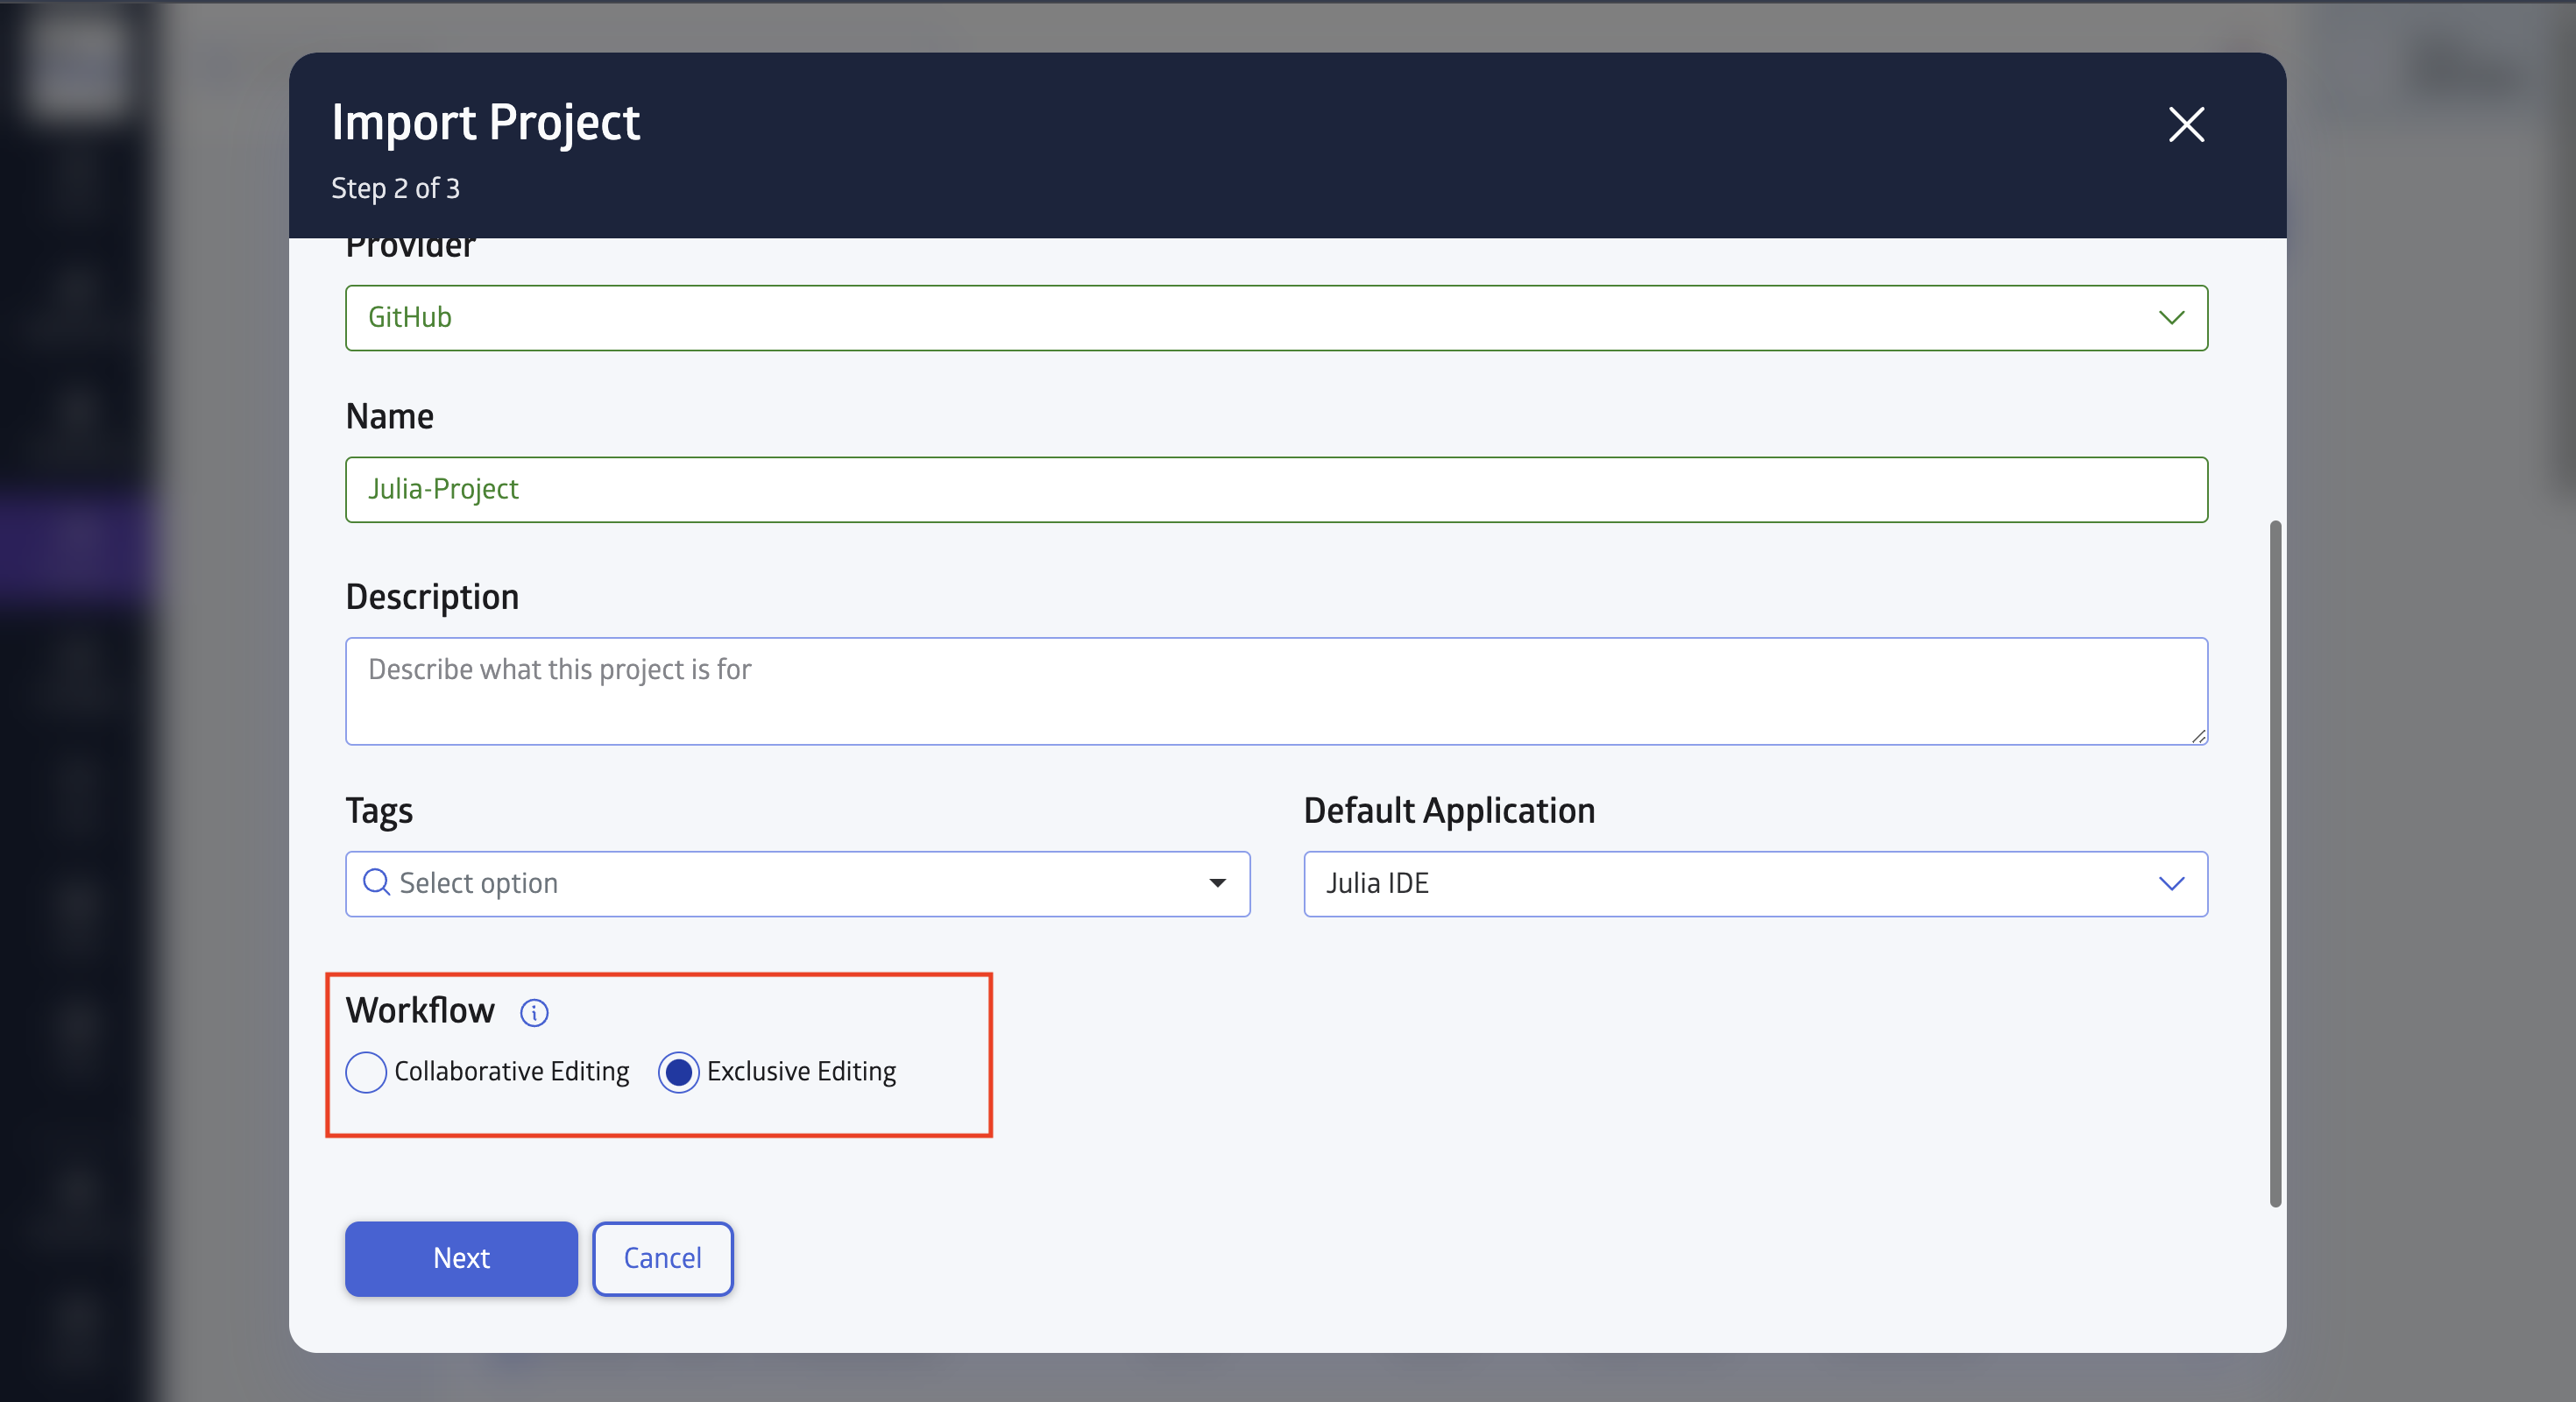
Then select the Workflow mode, either Exclusive or Group and click Next.
Exclusive mode locks the ability to edit the project to one user, who can transfer that ability to another user through the JuliaHub project view (a commit is automatically created every time editing rights are transferred).
Collaborative editing provides each user their own branch; all of those branches are merged onto the main branch when the project is published.
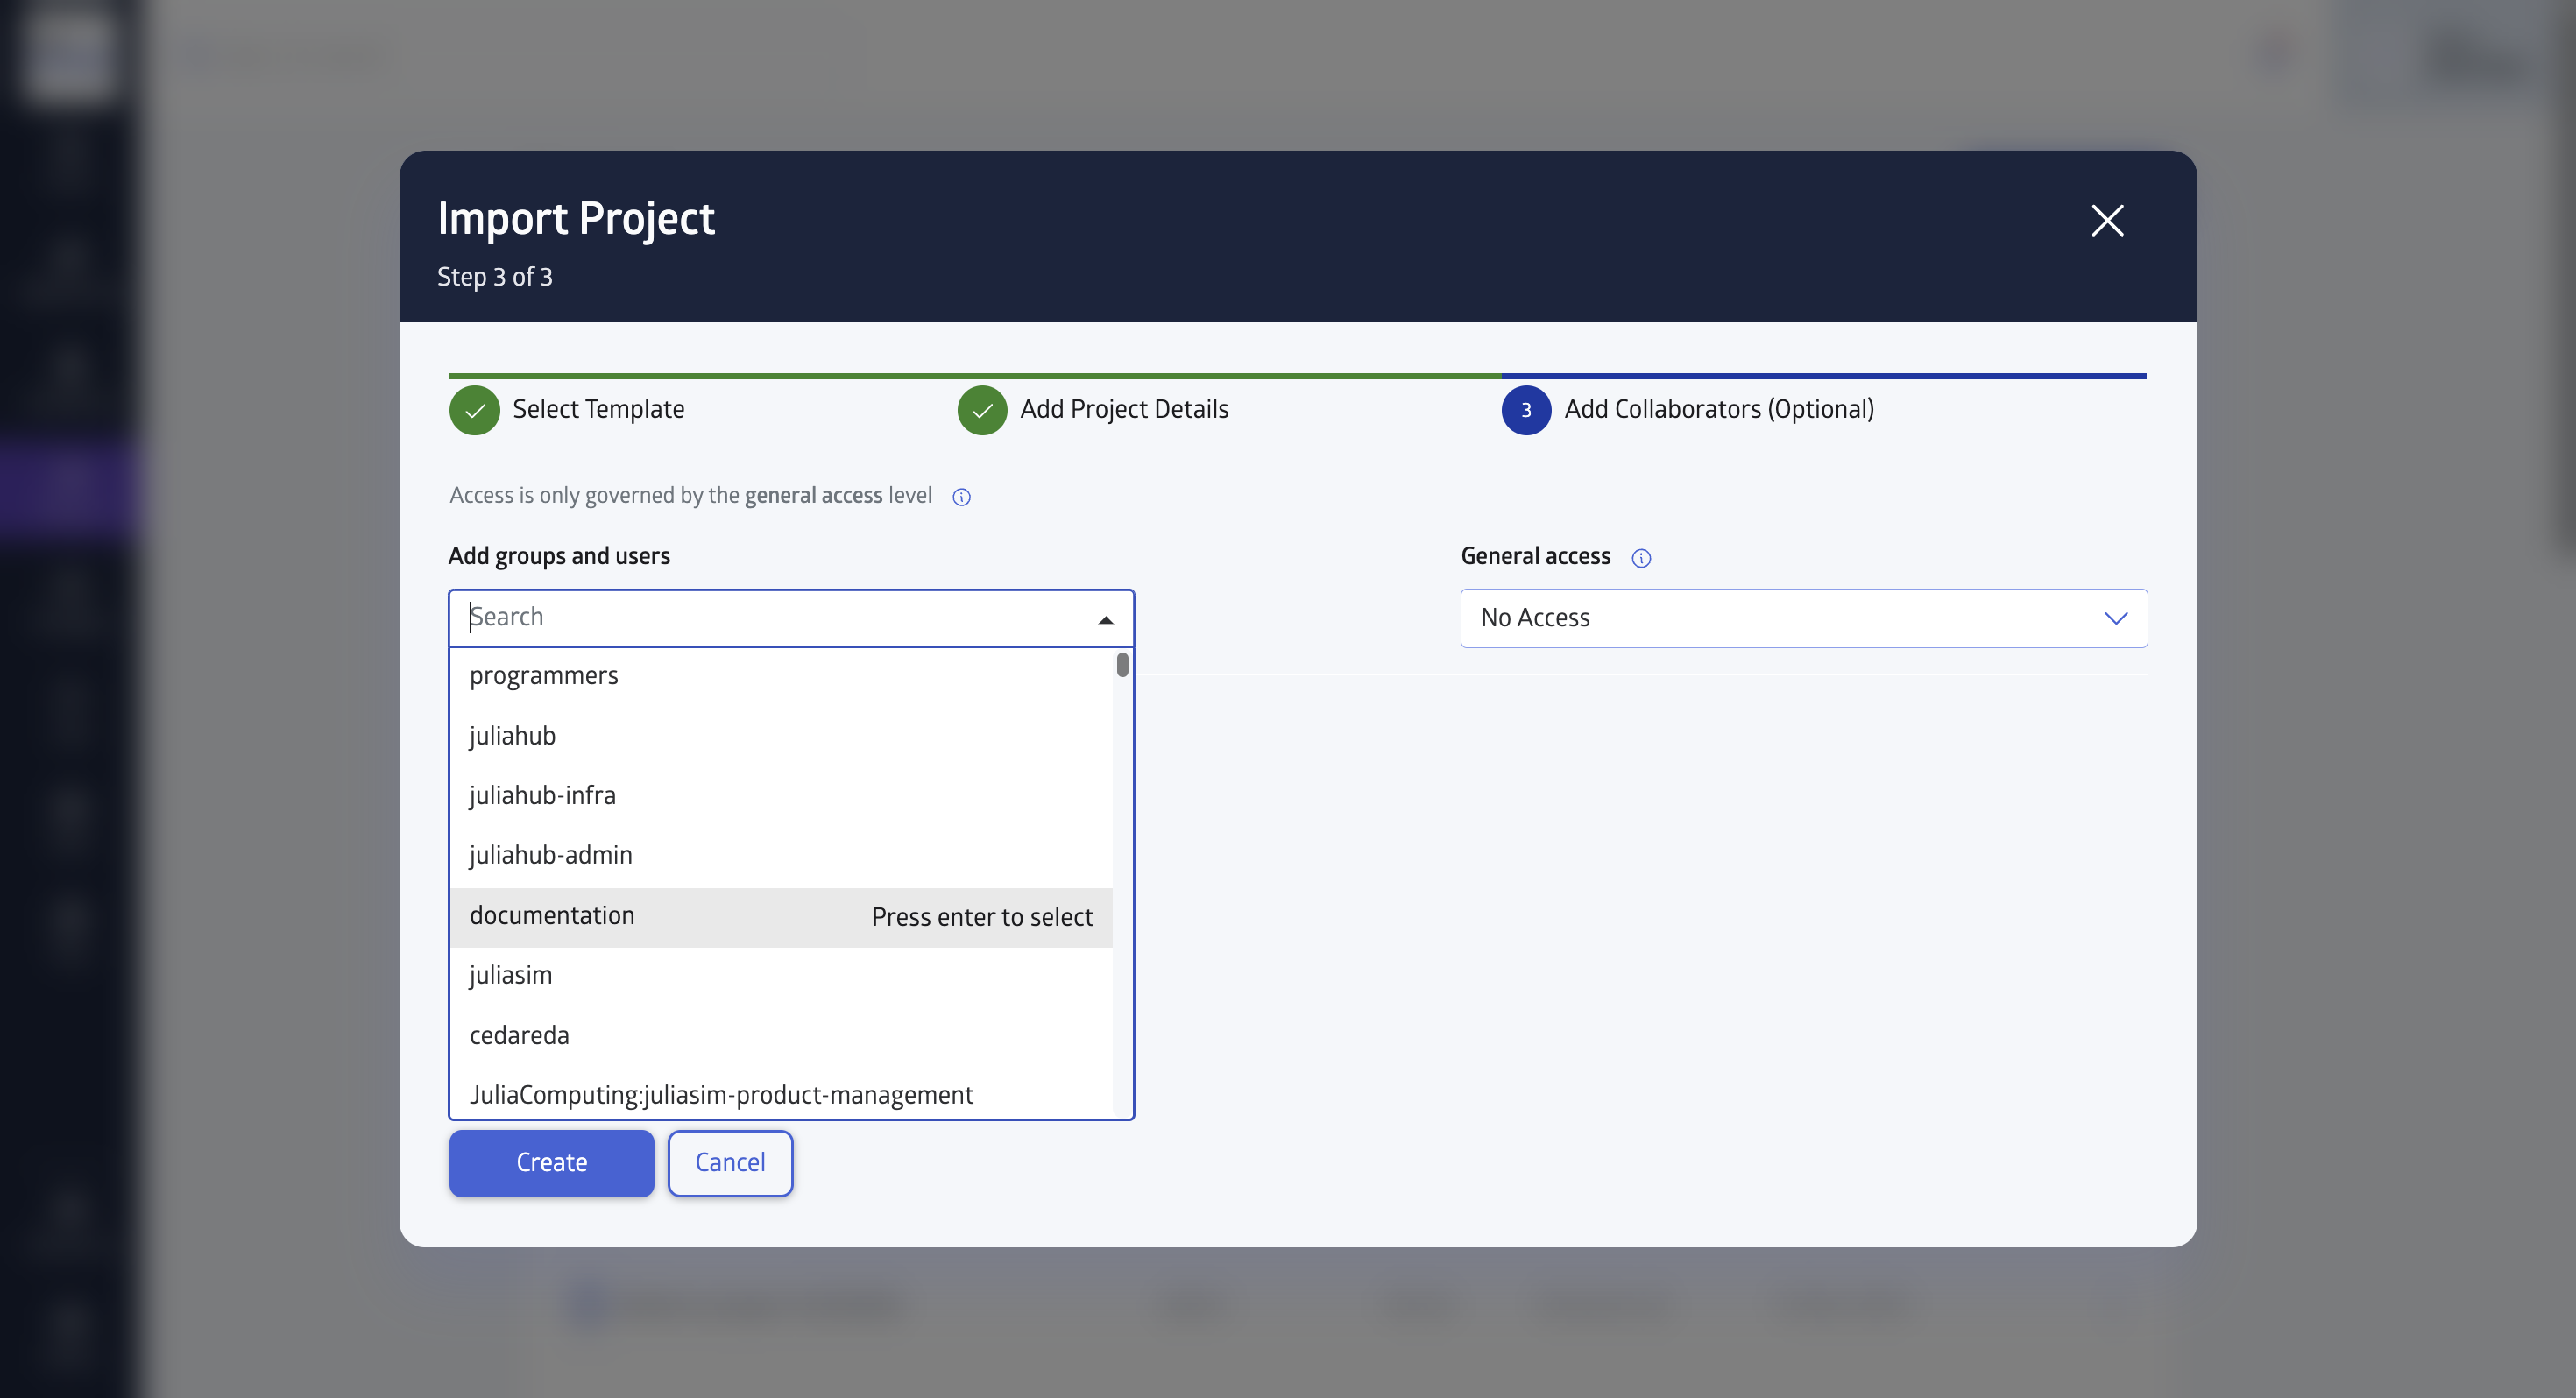
In the last(optional) step, you will be asked to add collaborators if you want to add your team contributor and give them tyoe of access. Once done, click Create.
Now your project will be created and added to your JuliaHub projects.
Creating a project that you can edit locally and on JuliaHub
If you want to create a project that you can edit both locally and on JuliaHub, then you will have to use the Git import feature mentioned above.
First, create a repository on GitHub or whichever Git provider is linked with your JuliaHub instance. Then, import it into a JuliaHub project.
The way to keep this synced is the "Publish" button on JuliaHub. When you have finished working with the project on JuliaHub, simply go to that project's page and click the "Publish" button. This is the equivalent of commiting all changes and pushing them upstream.
Then, you can git pull these changes locally and continue working. You must push those changes back to the Github repository when done there.
To pull changes on GitHub back to JuliaHub, simply press the Fetch button on the project page. It's important that you do this before launching a JuliaHub application from that project, as you will encounter merge conflicts otherwise!
Two modes of editing: Collaborative and Exclusive
When you start a project, you can select one of two workflows for editing.
Collaborative editing is a git-based workflow where multiple people can make changes in their branches, and those branches are then merged with the main branch via a Publish button.
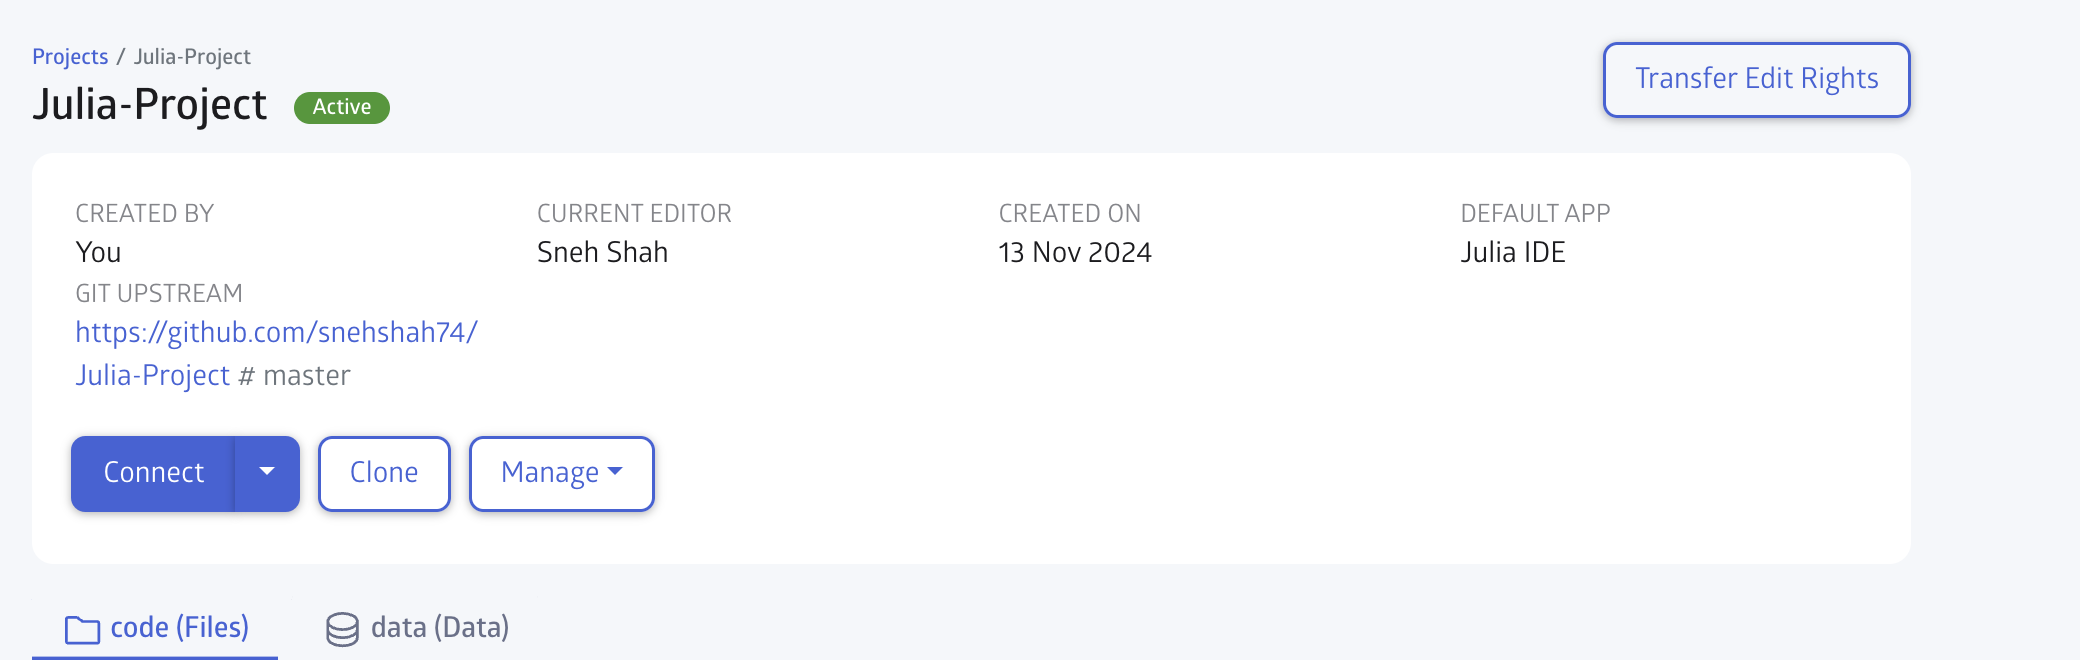
Exclusive editing is the other option where only one user can make changes to a set of resources at a time. That one user is the only one with edit access until they "transfer" edit rights to another user.
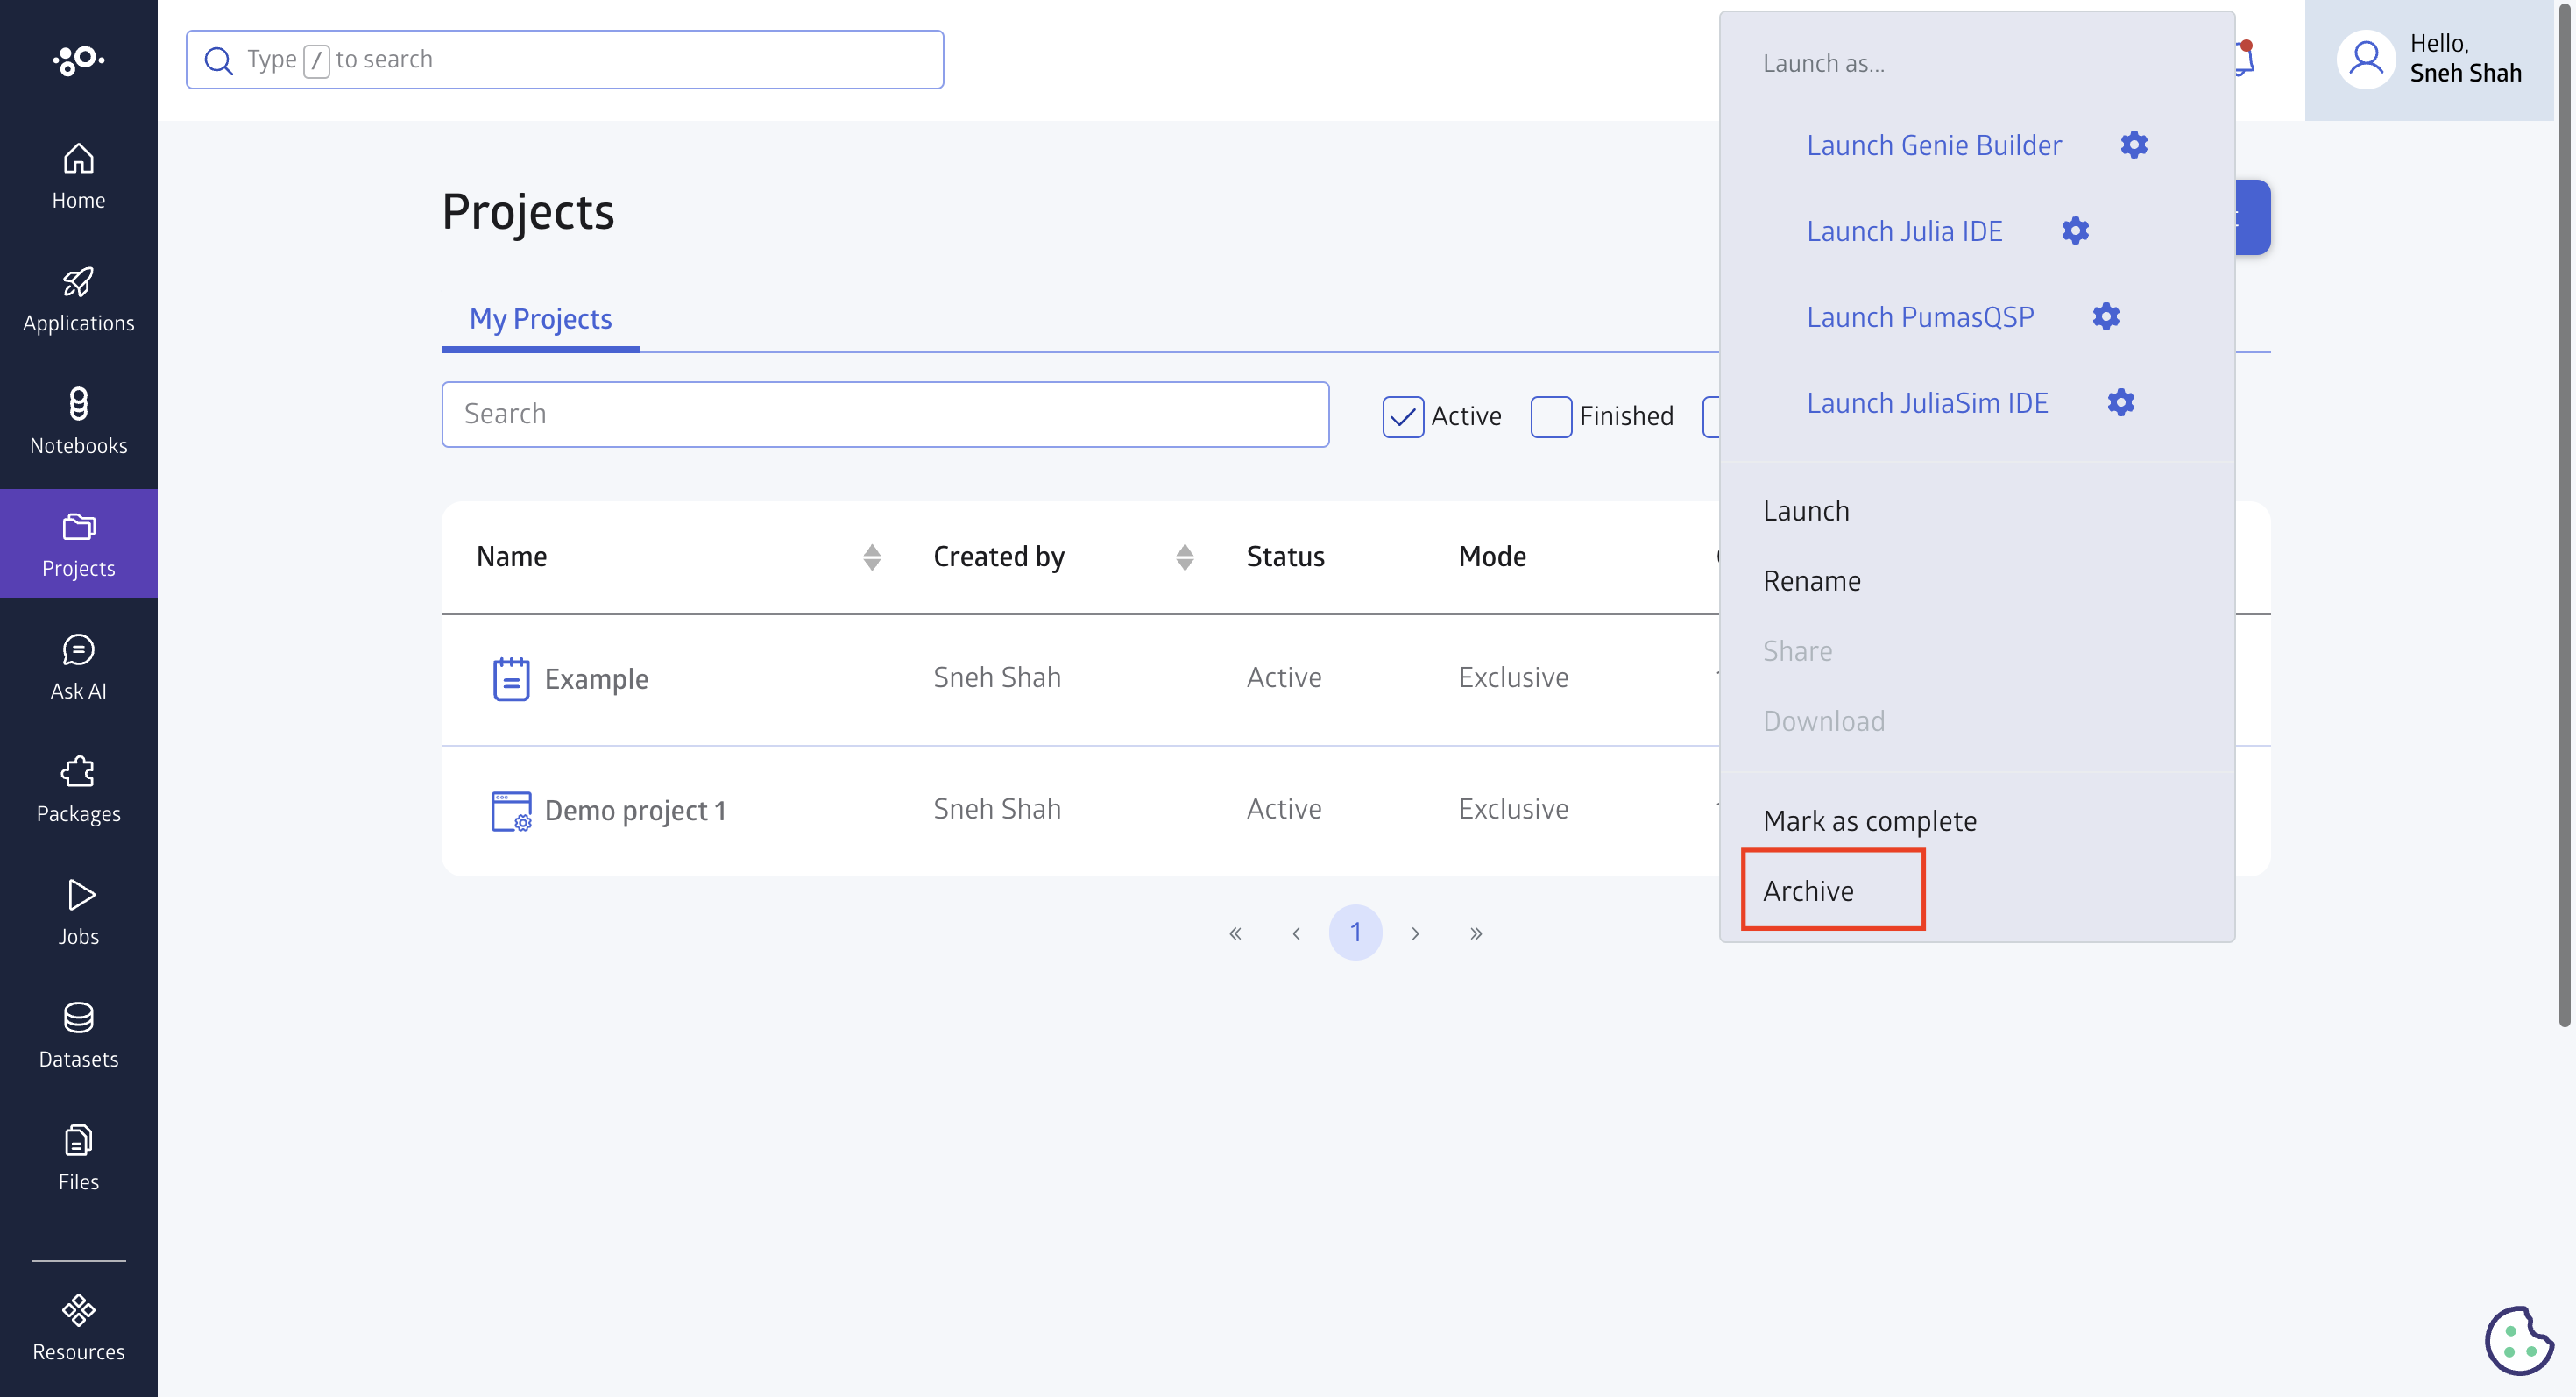
Active, Finished, Archived Projects
You can also go back to the Projects tab to see all active projects. Additionally, admins can mark a project as finished, and it will move to the finish tab.
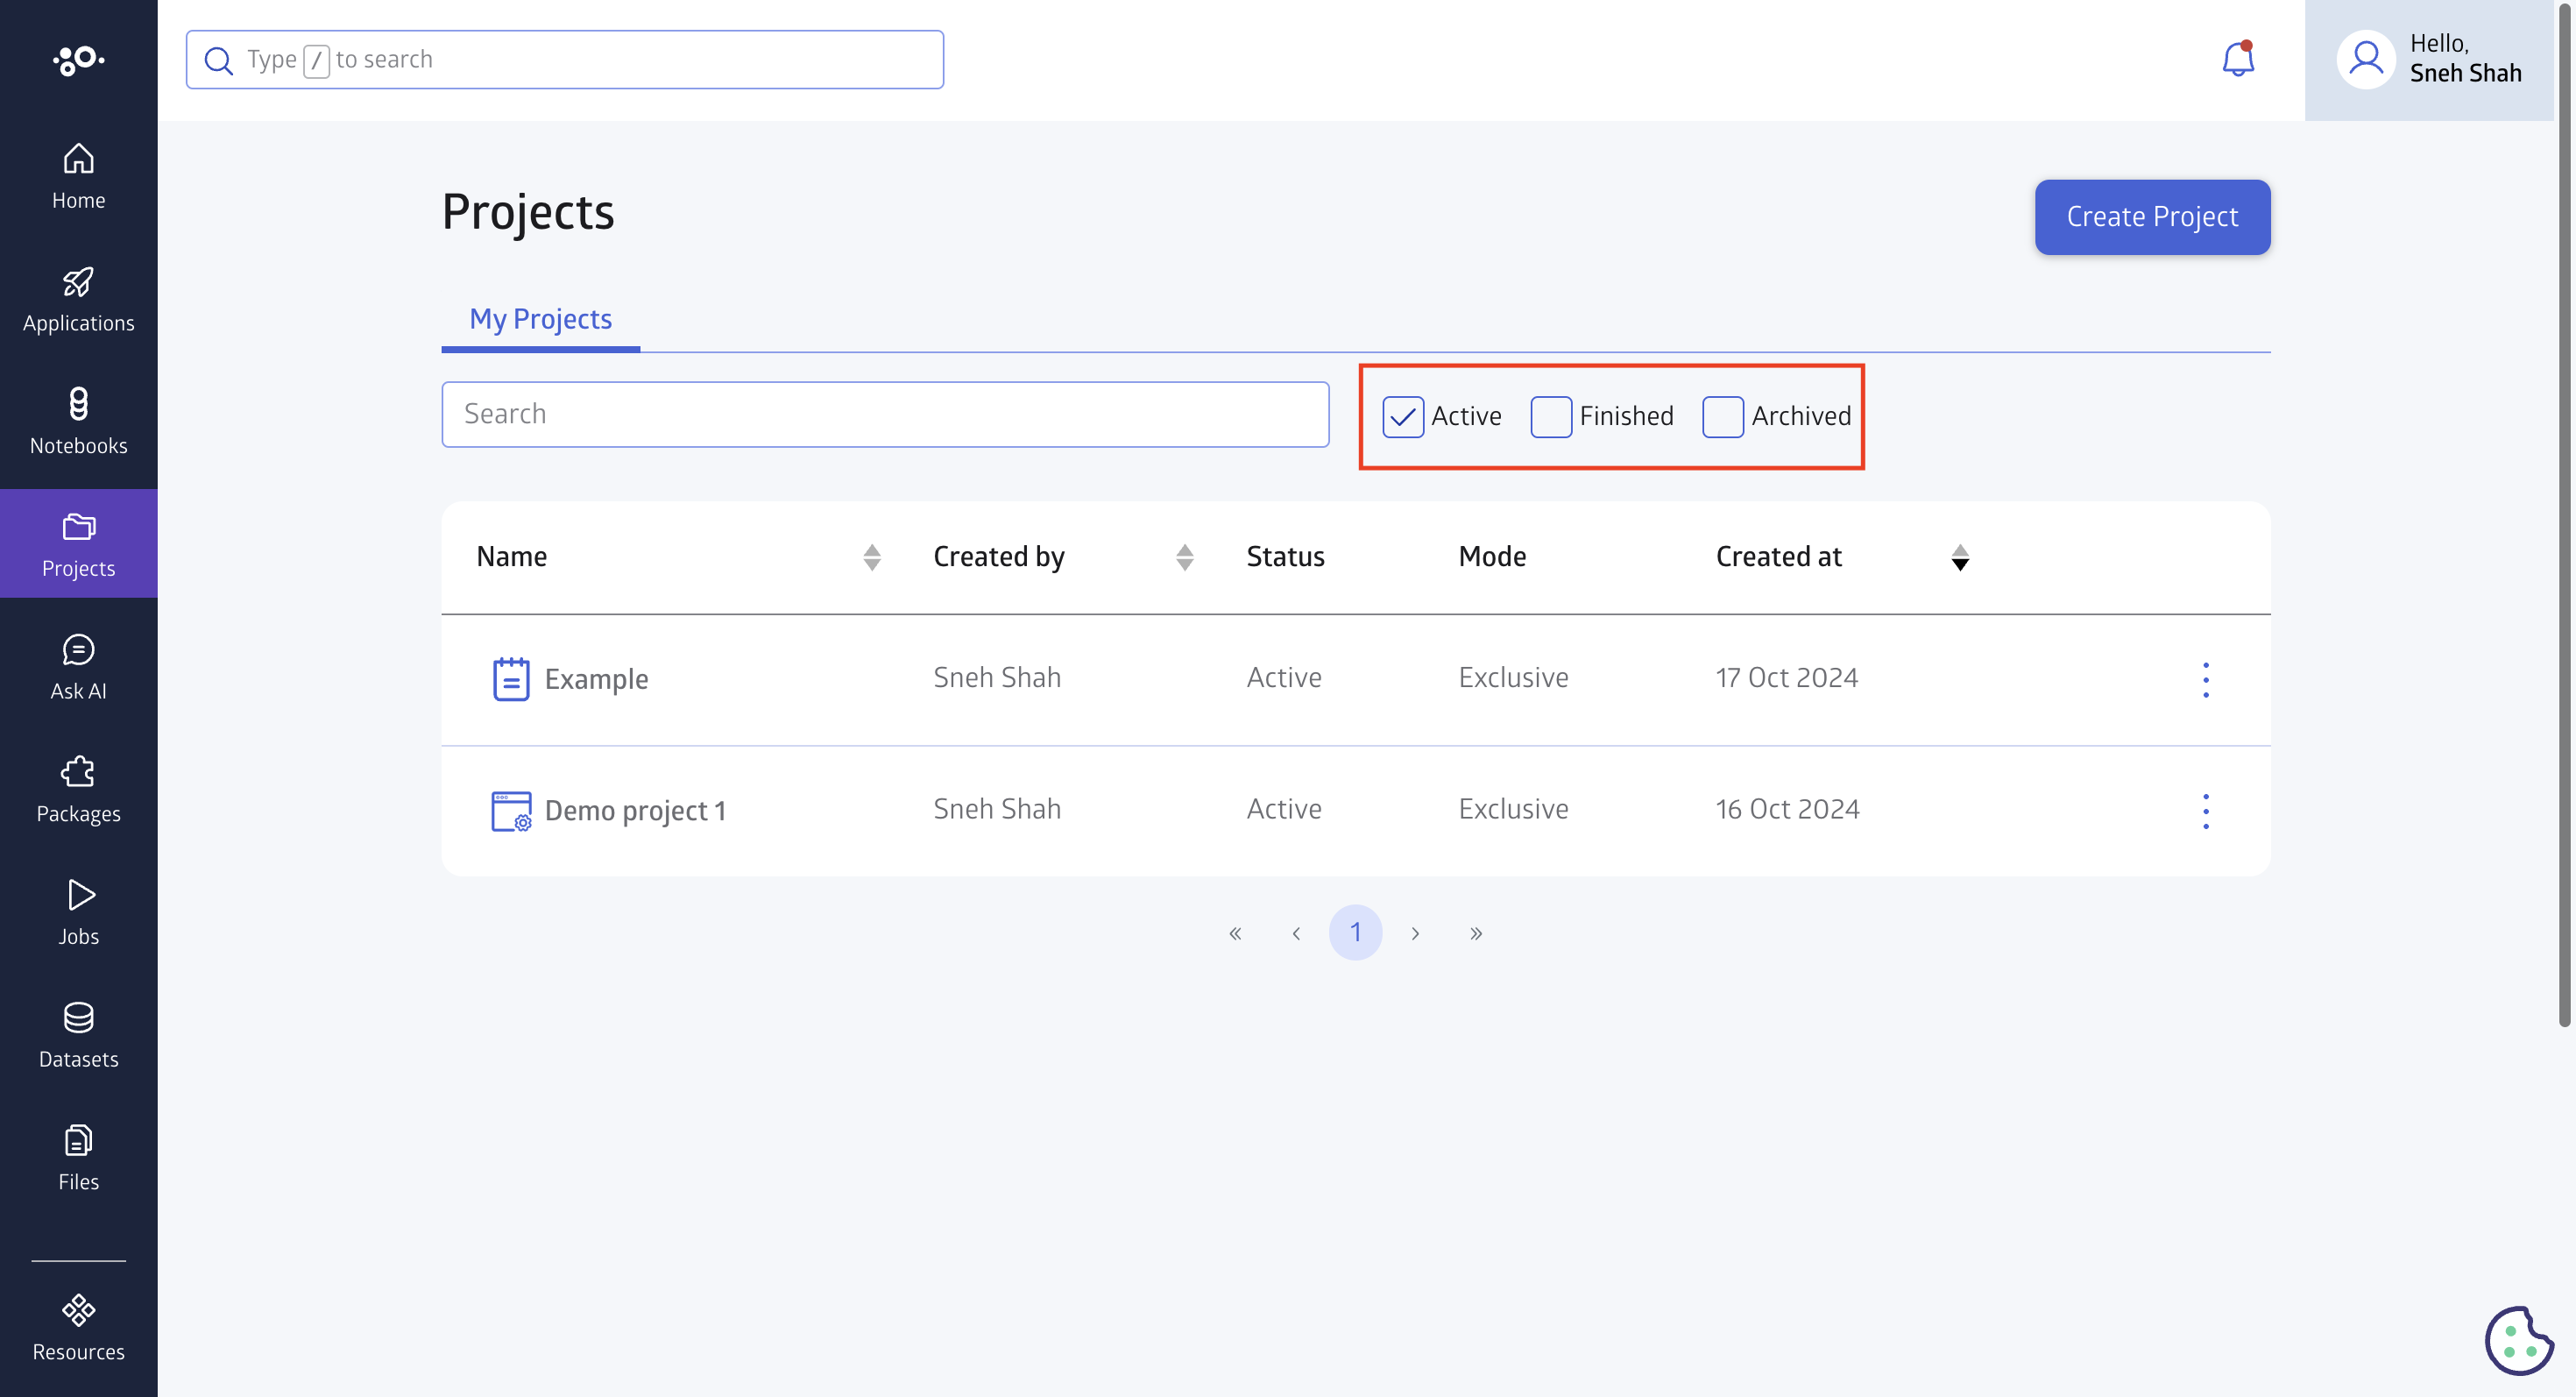
Projects can be also be archived so that they are no longer usable, but can be reactivated in the future should the need arise. You may also wish to download or share your project.