Designing and simulating with xschem
Xschem is one of the more popular schematic editors for open source PDKs, with device symbols being included with the PDK. Unlike KiCAD, it is developed with IC design in mind, making it more suitable for nontrivial designs. It is also able to export spice netlists that can be used with CedarEDA. Here is how.
Installation
The easiest way to install xschem files for one of the open source PDKs is to use open_pdks, a collection of build scripts to download, patch, and install the PDK on your machine.
For the most up-to-date information, check the link above, but the gist of it is
git clone https://github.com/RTimothyEdwards/open_pdks
cd open_pdks
./configure --enable-gf180mcu-pdk # or --enable-sky130-pdk
make
sudo make install
make veryclean
This will install the PDK in /usr/local/share/pdk
Next, we need to install xschem, making sure to get a recent version. At the time of writing, the Ubuntu package is too old and will not work.
The safest bet is to build from source. Again, for the most up-to-date information check the above link, but the gist of it is
git clone https://github.com/StefanSchippers/xschem.git xschem-src
cd xschem-src
./configure
make
sudo make install
Design
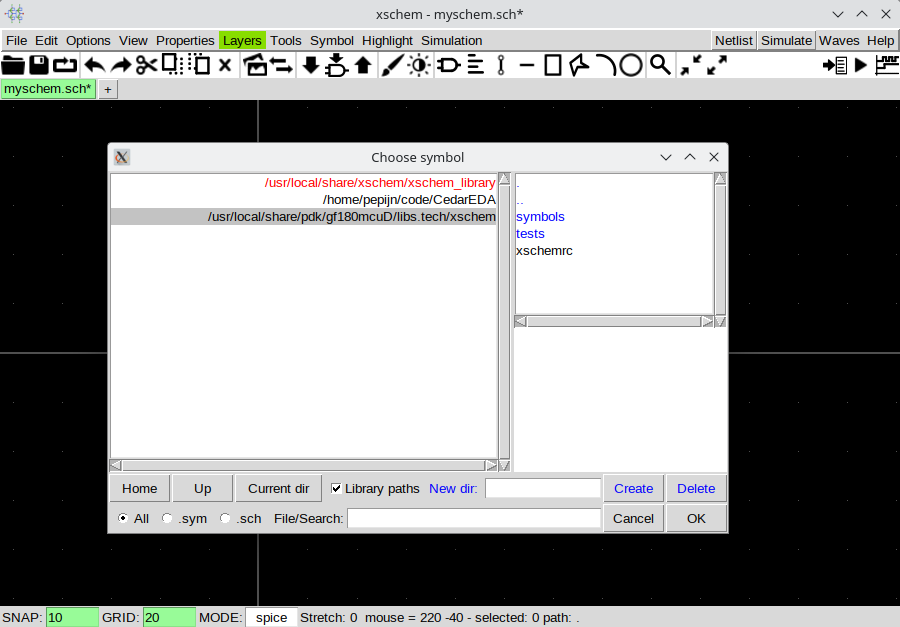
Launch xschem with the rcfile option pointing to the xschemrc that came with the PDK of choice. This will set up the paths to PDk devices symbols and related configurations.
xschem --rcfile /usr/local/share/pdk/gf180mcuD/libs.tech/xschem/xschemrc myschem.schNow press Ins to bring up the device window. You'll see xschem_library with ideal devices like voltage sources ande resistors, the current folder, and a PDK folder with symbols for its device models.
It is worth checking out the manual, but here are some bare essentials:
Insto insert devicesmto move the selected elementsqto open device propertieswto start drawing a wire or make a corner
That should be enough to draw a minimal circuit. Two crucial tips to prepare for simulation:
- Don't foget a ground node, it's called
gndin thexschem_libraryfolder. - You'll need to add a
codeorcode_shownelement to actually include the PDK.
To do the latter
- Press
Insto insert acode_shownelement - Select it and press
qto open properties - Change
Edit attrtovalue - Insert the following code
For GF180
.LIB "jlpkg://GF180MCUPDK/sm141064.ngspice" typicalFor Sky130
.lib "jlpkg://Sky130PDK/sky130.lib.spice" ttThe end result could look something like this 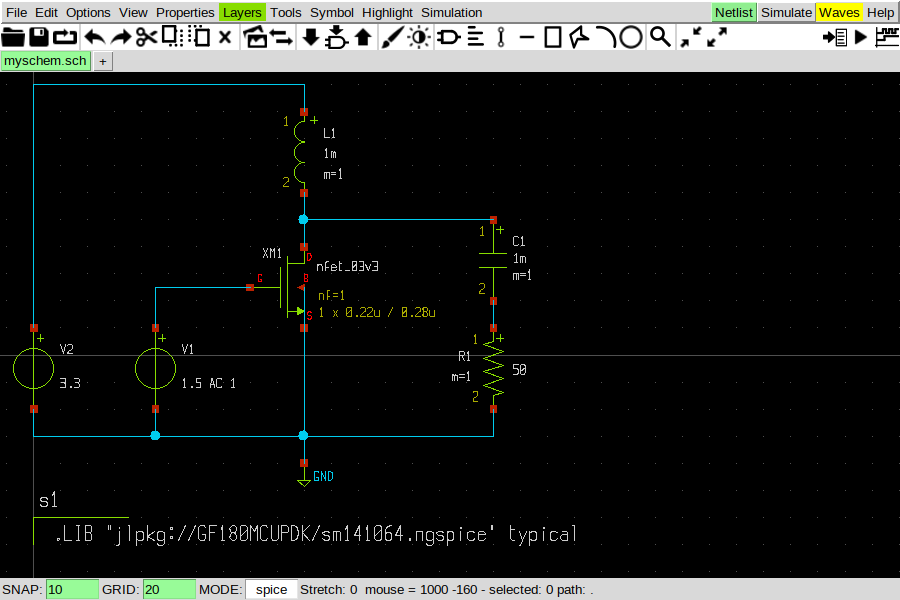
Simulation
To generate a suitable spice netlist, first select Simulation -> Set netlist Dir and after selecting a location press the Netlist button in the top right.
From there you can drag-and-drop this netlist into the VSCode explorer pane and load it as follows.
using CedarEDA

using GF180MCUPDK
# or
using Sky130PDK

schem = joinpath(@__DIR__, "myschem.spice")
sm = SimManager(schem)
For performing sweeps it might be good to know that there is a param symbol to insert spice parameters that can be used as explained in Running Parametric Sweeps.